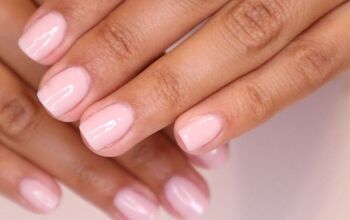
Glam Nail Stamper and Dip Powder Nails Tutorial

Welcome to my nail stamper tutorial. I’m going to show you how to apply dip powder nails and how to use nail stamps.
If you are worried that stamping nails is difficult, don’t sweat it. I’m going to make this dip powder nails tutorial easy to understand and simple to execute.
Upstyle Recommends!
Tools and materials:
- Builder gel
- White gel
- Sparkly dip powder
- Clear dip powder
- Dip plate
- Stiff bristle brush
- File
- E-file
- Buffer
- Stamping kit including stamp pad, scraper, stamper
- Isopropyl alcohol
- Lint-free wipes
- Acetone
- Activator

1. Builder gel
Once your nails are cleaned and prepared, put builder gel on your nail as the base. This way you can dip in the color twice and do one dip with clear powder.

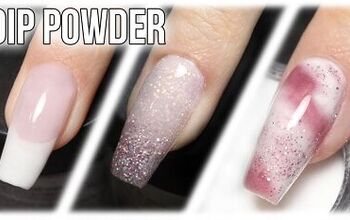
2. Flakey dips
When you’re using a flake dip powder you need to make sure you’re lying your nail flat onto the dip powder. I recommend using a dip cup.
Pour your powder into the dip cup and then shake it around before each dip to bring the flakes, or larger chunks to the surface.

Put a piece of tape on the fingertip of the pointer finger on the hand opposite the one you’re working on.

Use that to press down the glitter on the nails to keep the nail from getting too thick and chunky. Just give the nails a minute or 2 to dry a bit so the polish doesn’t come off on the tape.

Brush over the nails with a stiff bristle brush between each layer to get rid of excess glitter.

3. Keep your layers clean
Push your cuticles back before each dip. That will help you get your dip liquids as close as possible to your cuticles without flooding them. You’ll also want to keep your layers as thin as possible.
It’s better to do a higher number of thin layers than a lower number of thick layers. Thinner layers crack less, chip less, and last longer.

Another thing you should do after each dip is take some kind of pointy nail tool or an orangewood stick to trace around the cuticles.
This will keep the dip base and powder from getting onto the skin. If you avoid getting the dip on the skin the gel will last longer.

4. Clear dip powder
Once you’re done applying your color layers, top them off with clear dip powder. That’s going to protect your color. It allows you to buff, file, and shape without affecting the color.

5. File, buff, shape
To make sure your nails are ready to be filed and buffed, tap on the nail with another nail to make sure you hear a clicking sound. If the sound is muffled at all you might not have activated the polish enough.

Use an e-file to clean up your cuticle lines.

6. Stamping
Wipe your nails with isopropyl alcohol. Now you’re ready for stamping. To apply the stamps, start by painting over the stamp in the color you want.

Then scrape the plate clean so the color just stays in the stamp impression.

Use cotton swabs to wipe off all the excess from the pad.

Then press your stamper onto the stamp pad to pick up your design.
If it doesn’t look right on the first try, you can always wipe off the stamper and the plate with acetone and start again.

Once you have it the way you want it, use a wipe to get rid of any other color the stamper may have accidentally picked up.

Then press the stamp onto the nail aligning the stamp image to the part of the nail you want to apply it to.

7. Smudge-free topcoat
Use a smudge-free topcoat over your stamps to keep the image looking nice and clean. Let it dry for 5-10 minutes.
Then go over everything with the activator. Just make sure you apply the activator gently.

Nail stamper and dip powder nails tutorial
Thank you for checking out my dip powder nails tutorial. I hope you picked up some good dip powder and nail stamping tips that will help you achieve professional-looking nails.
Be sure to leave me a comment to let me know how your dipping and stamping went.
The author may collect a small share of sales from the links on this page.


Comments
Join the conversation