How to Apply Nail Decals Over Dip Powder Nails

If you are struggling with nail art, but can’t, or don’t want to use gels, then this tutorial is just for you!
Follow along for some great dip powder nail design ideas, and tips on how to size your nail decals correctly.
Tools and materials:
- Nail dip powder kit (including base coat, activator, and top coat)
- Stamping polish (optional)
- Dip cup or cupcake liner
- Washi or masking tape
- Clear jelly stamper
- Glass cuticle pusher
- Nail scissors
- Angled nail brush (optional)
- E-file (optional)
- Lint-free wipes or paper towels
- Isopropyl alcohol (for cleaning)
- Nail brush (for cleaning)
- Dip powders (various colors and types, including glitter flakes or foils)
- Water slide decals
- Decal sizer tool
- Sticky base coat
- Clear dip powder
- Acetone (optional, for acetone-safe individuals)
- Nail decals (from O Coco Designs or similar)
- Clear dip top coat

1. Dip application
Prep your nails with clear dip base.

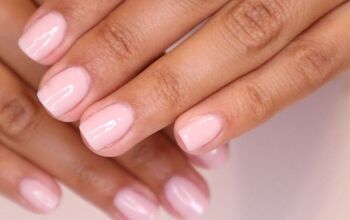
Apply dip powder as the base for your manicure. Opt for a white background if using clear decals for better color visibility. Use stamping polish to fill in behind clear-backed decals if necessary.

Clean the edges of your dipped nails.

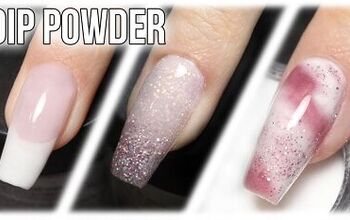
2. Working with different types of dip powders
Pour glitter flakes or foils into a dip cup or cupcake liner. Consider using a sturdy dip cup to avoid spills.

Use Washi or masking tape to protect the skin from nail products when you are pressing down on your dip powder.

3. Applying chunky glitters
Apply a base layer of dip powder and add chunky glitters on the second dip. Aim for thin layers to avoid thick nails.

Finish with a clear dip powder to seal the design.

4. Using a decal sizer
Use a decal sizer tool to accurately size your decals. Select a size slightly larger than your nail's width.

Trace and cut out the decal according to the size guide.

5. Preparing and applying decals
Dunk the decal in water for 15 seconds.

Slide off the backing and place it on a lint-free surface.

Apply a sticky base to your nails.

Position the decal on the tacky surface using a small clear stamper.

Use a silicone nail tool to push down the decal.

Trim excess decal with a glass cuticle pusher or file.

6. Apply finishing touches
Apply clear dip powder base over the decal.

Then, apply clear dip powder.

Follow your usual filing, buffing, and shaping routine. Use an e-file for clean cuticle lines.
Spritz nails with isopropyl alcohol and wipe off any residue.

7. Apply top coat
Ensure shiny and long-lasting results by following the instructions for top coat according to the dip powders used.

How to apply nail decals: cute and colorful nail design
Now you are ready to express your creativity with your own dip powder nail ideas!
What do you think of this dip powder nail design?
Leave a comment to let me know if you liked this, and what your dip powder nail designs are.
The author may collect a small share of sales from the links on this page.


Comments
Join the conversation