How to Do Dip Nails at Home for Beginners

I’m going to give you guys a tutorial on how to do dip nails at home for beginners.
If you’re looking for help and tips for dip powder on short nails, and you’re new to the game, I’ve got some great pointers for you. Let’s get started.
Upstyle Recommends!
Tools and materials:
- Glass cuticle pusher
- Nail drill bit
- Buffing block
- Alcohol
- Orangewood stick or pointy nail tool
- Stiff nail brush
- Dip base
- Dip powder (clear and colored)
- Builder gel (optional)
- Dip cup
- Chunky glitter
- Piece of tape
- Activator
- File or buffer block
- Spray bottle for isopropyl alcohol
- Top coat

1. Push cuticles back
Before anything else, start by pushing back your cuticles. This will get rid of any excess skin on the nail bed.

You can either use a glass cuticle pusher or a nail drill bit if you’re a little bit more experienced.

Take your buffing block and buff the shine off your nails. Then wipe it with alcohol.

2. Dip base
Apply one layer of dip base to your nails and let it dry. That will help your dip adhere better. Keep the dip base as thin as you possibly can.

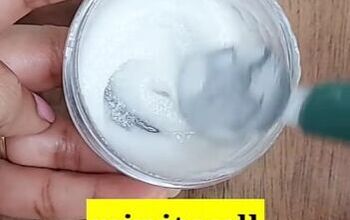
3. Pouring versus dipping
You might want to consider pouring the dip over the nails rather than dipping them. This is a better method for beginners because dipping can get lumpy if you don’t have experience.
When using, it is preferable to apply more thin layers than a fewer amount of thick layers. It tends to crack and peel off easier.

4. Between layers
Use an orangewood stick or any pointy nail tool and trace around the nails after each dip. This will ensure you’re not getting any dip liquids or dip powder stuck on your skin.
Getting it on the skin makes it more likely you’ll get early lifting.

Use a stiff nail brush in between each layer of dip after they dry. Brush off any excess powder before applying the next layer. That will prevent your powder from getting too thick or lumpy.
When working with short nails, be careful not to flood the sides of the nails with dip liquid on the first layer. When you get to the second layer, make sure you get the entire nail covered with the dip liquid.
You can start with 1 layer of clear, then do 2 layers of color. Then you can finish with a layer of clear. Alternatively, you can start with a thin layer of builder gel instead of that first layer of clear.

5. Chunky glitter
When working with chunky glitter, pour it into a dip cup. That way you can shake it around and get the pieces you want on my nail for each dip.
For the first dip of chunky glitter, lay your nail flat onto it to get the base of the actual glitter. On the second dip, try to get more of the bigger chunks. This prevents the nail from getting too thick.

For the 3rd layer go through and add some bigger chunks anywhere it looks a bit bare. Do this by adding a dip base to any areas that look empty and then stick the chunks on there.
If you want to press the glitter down, put a piece of tape on your fingertip first. That way you won’t get any base on your skin.

6. Clear dip
I am an advocate for doing a clear dip for your last layer. A clear layer will protect your color or your glitter when you buff, shape, and file.
The only caveat is that you must make sure you get a high-quality clear dip powder. The low-quality clear dip powders can be cloudy.
Once you’re done with your clear dip powder brush off the excess, and start applying your activator. Be sure to use enough activator to harden your nails all the way through.
To check if your nails are hard enough, tap on the nail bed. If it makes a clicking sound, then your nails are nice and hard which means they’re ready to buff and shape.
7. Finishing up
You can use a file or a buffer block. The goal is to smooth out the top of your dip so the topcoat lays nicely.
After you’re done buffing and shaping, spray your nails with isopropyl alcohol before applying your topcoat. This is to make sure you don’t have any dust left on your nails.
Every dip comes with its own instructions for top coating. Make sure you follow the instructions for the top coat of the same brand as the dip.

Glam, chunky glitter dip powder on short nails
I hope you guys enjoyed learning how to do short dip powder nails. I love this short nails dip powder technique because it’s so great to work with chunky, fun-looking glitter.
Leave me a comment. Let me know how your nails came out.
Next... This Watercolor Nail Art Design is so Easy to Do. So why not try it out?
The author may collect a small share of sales from the links on this page.


Comments
Join the conversation