Easy Hack to Fix Your Dip Powder Nails at Home

It’s all too easy to make a mess of your dip mani and I’ve done it many times!
Today, I’m going to show you how to fix dip powder nails at home and how I covered my mistakes while doing these amazing animal print design nails.
Plus you’re going to see how to add stickers to your mani the no-fuss way.
Upstyle Recommends!
Tools and materials:
- Purple dip powder
- Blue dip powder
- Orange dip powder
- Clear dip powder
- Animal print stickers
- Bonding liquid
- Base coat
- Activator
- Top coat
- Tweezers
- Scissors
- Cuticle pusher
- Large eyeshadow brush
- Ombre brush
- Nail brush
- Nail buffer
- Hand file
- E-file
- E-file cuticle bit
- Isopropyl alcohol
- Lint free wipes
- Orange stick
- Dip cups
- Bottle holder
- Finger rest

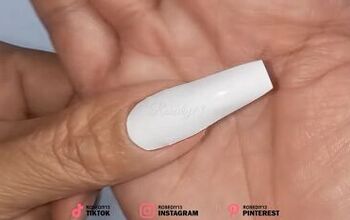
1. Brushing off too much powder
On my thumb nail, I applied the base coat as normal and poured the blue dip powder over my nail.
I tapped off the excess powder then used an orange stick to clean around the sides and cuticles. All good so far!

Then I used my nail brush to scrub off the powder, but it was too early and far too much powder came off.
I added another layer quickly and left it to dry properly to see if it would look okay. Unfortunately I brushed that off too early as well, and I had to fix the damage another way.

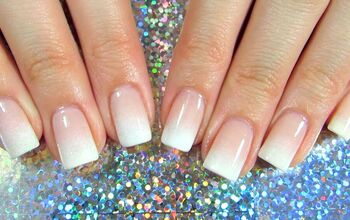
2. Uneven ombre nail
I applied the blue powder to half of my nail and the orange to the other half.

I tapped the powders on with a brush and let them set while I cleaned up the edges. Then I brushed them lightly before adding another layer.

I added the second layer of orange first and then the blue. I find it helps even out the ombre if I switch the order of colors on the first and second dips.
The orange powder is more pigmented than the blue, and I added too much of it the second time over the centerline.
I tried adding more blue and scrubbing it in to cover the extra orange, but I still had a jagged edge down the middle.
With the second ombre that I did on my ring finger, I used a thinner ombre brush to control the amount of powder more precisely.
The second step of an ombre for me is to use my tapping brush to scrub the colors together to help them blend.

3. Uneven dip
When I laid my ring finger nail flat, the liquid ran a little bit into the side of my nail so I ended up with too much powder on that side.
These liquids are thinner than the ones I usually use, so I also flooded the cuticles on most of my nails and had to fix them later.

4. Adding stickers
I added these really neat animal print stickers on my nails after the second dip layer.
I used fine tweezers to lift the stickers from the backing sheet and place them precisely on my nails.

I added extra stickers on my thumb nail where I brushed off too much powder, to cover the areas that looked too thin.

I put a sticker strip down the center of my pointer nail, where the two colors didn’t blend well. I trimmed the end with scissors and then filed it gently on the very tip so the sticker didn’t extend past the end of my nail.
I pressed down the stickers really well before the next stage.

5. Keeping the stickers in place
I poured clear dip powder over the stickers until it was completely soaked up. I also pressed my nail into the powder, to make sure I had plenty on my nail.

Then I brushed over the clear powder with a stiff nail brush to remove the excess.

A layer of activator went on next and once that I dried, I filed and shaped each nail.

6. Cleaning up the cuticles
I bought a new set of carbide bits for my e-file that are specifically shaped for cleaning the sides and bottom of the nails.
They really helped with my flooded cuticle issues and also with the uneven dip on my ring finger.

The best thing about them is that I could use them right up against my cuticle without damaging my skin.

7. Finishing
After using the e-file, I sprayed isopropyl alcohol on my nails and cleaned it off with a lint free wipe.
Then I did a final push back of my cuticles before adding two layers of activator.

I waited two minutes before brushing on two layers of top coat. I was following the instructions of the specific brand for this, so please check yours.

How to fix dip powder nails at home: animal print ombre nails
Even if you really mess up as I did, there’s usually a way to fix it. If nothing else, you can add a sticker or decal to cover it up!
Please let me know in the comments if you enjoyed this dip powder nails tutorial, and if there are any topics you’d like me to cover.
Next, learn How to DIY Viral Fairycore Nails at Home.
The author may collect a small share of sales from the links on this page.


Comments
Join the conversation