This Easy Tote Bag DIY is So Cute and Practical

Hi guys! Welcome to my tote bag DIY tutorial. This is one of my favorite DIY tote bag patterns for a large, extra-wide-bottomed bag. Grab your supplies and let’s get started.
Tools and materials:
- Fabric
- Lining
- Interfacing
- Scissors
- Pins
- Sewing machine
- Ruler
- Marker

1. Cut
Cut 4 pieces of the outer fabric at 13 by 18 inches, and 4 pieces of lining fabric at the same measurements. For the bag handles, cut 2 pieces of fabric and 2 pieces of interfacing at 4 by 24 inches.

2. Handles
Iron the interfacing to the wrong sides of the handle fabric.

Fold one bag handle in half lengthwise and iron.

Then open and fold it ¼ in lengthwise and iron.

Fold it in half again and iron.

Sew along the length of both sides and then repeat the process on the other handle.

3. Shape
Take 1 piece of the bag fabric and fold it in half bringing the 18-inch edges together.

Measure 6.5 inches in from 1 of the open corners.

Then use a ruler to connect that point to the opposite corner.

Round the edge at the angle.

Cut out that piece of fabric.

Use it to trace and cut the other 3 pieces of fabric as well as all the lining pieces.

4. Sew
Take the 4 pieces of outer fabric and 2 pieces together with the right sides facing in. Do the same with the other 2 pieces. Sew along the edge of each from the tip to the bottom corner.

Repeat these steps with the lining.

Make some cuts along the rounded side that’s been sewn together on both pieces of the outer fabric and lining.

5. Put it all together
Open both pieces of the bag and place them right sides together with the seams lined up in the center.

Pin and sew the edges of the bag together leaving the top open. Do the same with the lining.

Make some cuts along the outer rounded edges of both the bag and the lining.

Place the lining in the bag with the right sides facing each other. Match the seams to each other and pin the fabrics together.

Sew together leaving a 3-4 inch opening.

Use the opening to turn the bag right side out and push the lining into the bag. Iron and then topstitch around the entire opening of the bag, also closing the 3-4 inch opening.

6. Attach the handles
Take one of the bag handles and measure 3 inches in. Do the same on the other side and on both sides of the other handle.

Place one side of one handle in the bag at one of the side seams with the 3-inch mark meeting the top edge of the bag.

Fold the seam around the handle and pin it in place. Do the same with the other side of the handle on the other seam and repeat with the 2nd handle on the other side of the bag.

Sew each handle in place by stitching a rectangle and an x.


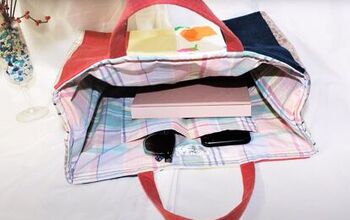
Tote bag DIY
I hope you all enjoyed learning this tote bag DIY design.
DIY tote bag designs are a great way to get your creative juices flowing while creating something practical and useful.
Leave me a comment and let me know if you love this DIY tote bag design as much as I do.
Next up, learn How to Sew a Large Tote Bag With a Fun Pocket.
The author may collect a small share of sales from the links on this page.


Comments
Join the conversation