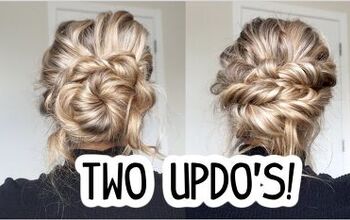
Cute and Easy Updo for a Wedding Guest

If you are heading to a wedding, and want a stunning easy updo that’s perfect for a wedding guest, this updo tutorial is for you!
In a few easy steps you will rock the glamor.
Tools and materials:
- 2 hair elastics
- Bobby pins
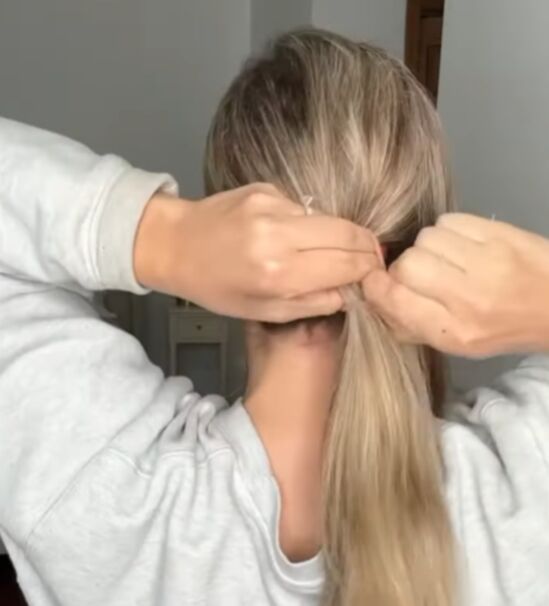
1. Make a ponytail
Separate out a front section of hair on one side only, and put the rest of your hair into a ponytail.

2. Make a bun
Pull the top of your ponytail through a hair elastic to make a small bun.

3. Make braids
Separate the remaining ponytail into two sections, and braid each section.

4. Wrap your braids
Tie the ends of your braids together with a hair elastic.

Criss-cross the braid at the end near your bun, bring your braid down over the bun, and push your bun through the hole in the criss-crossed braid.

Pull the remaining ponytail below your bun to tighten it, and then use your fingers to slightly loosen the braid.

Twist any remaining ends of your ponytail and tuck them into the bun.
Bobby pin your bun to hold it in place.

5. Make a side braid
Braid the hair you had left out at the front.
Pinch and pull to slightly loosen the braid.

Drape that braid right on top of your first braid and wrap it around your bun.

Twist any loose ends of hair and tuck them into your bun.

Place bobby pins underneath your bun and above your braid to secure everything in place.

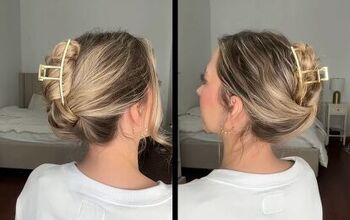
Easy updo for wedding guest
Here is your finished wedding guest updo from the back.

And this is how it looks from the side.
It’s so glamorous, everyone will think you’ve been to a salon!
Next, learn How to Create a Glamorous Bridesmaid Ponytail.
The author may collect a small share of sales from the links on this page.


Comments
Join the conversation