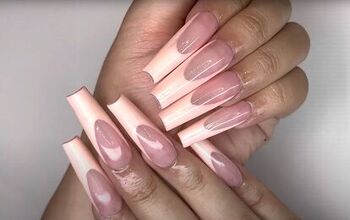
Cute and Easy Pink French Tip Nails

In this tutorial, you'll learn how to achieve a classic white French-tip nail manicure using pink and white dip powders and stamping polish, without the need for gels.
This process is perfect for DIY French-tip nail art enthusiasts who want to create a timeless, elegant look reminiscent of the classic French manicure.
Tools and materials:
- Pink dip powder
- White stamping polish
- Clear dip powder
- Builder gel (optional)
- Dip liquids (base coat, activator, and top coat)
- French Tip stamping place
- Jelly stamper
- Flexible nail file
- Isopropyl alcohol
- Non-acetone nail polish remover
- Smudge-free top coat
- Cuticle bit (optional)
- Nail art barrier
- Buffing block
- Angled eyeshadow brush (for clean-up)

1. Prepare your nails
Apply a thin layer of clear builder gel on your natural nails to create a smooth surface.
This helps in building a slight apex, especially if your nails are short or have a natural C curve.
If your nails are flat, create an apex using clear dip powder. Apply the first dip about halfway down your nail.
The second dip should extend three-quarters of the way back, slightly overlapping the first layer.

2. Apply the pink dip powder
Dip your nails in the pink powder by pouring the powder over your nails.
Repeat for two layers, covering the entire nail down to the cuticle.

Brush off any excess powder between layers to prevent thickness.

3. Seal with clear dip powder and activate
After applying the pink dip powder, apply a layer of clear dip powder to seal the color. This will protect the color during buffing and filing.

Brush off excess powder, apply activator, and wait for the nails to harden.

4. Buff and shape
Use a flexible nail file to shape your nails.
Gently buff the surface until smooth.
Clean your nails with isopropyl alcohol to remove any dust or residue.

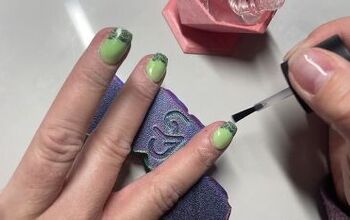
5. Apply the white French tips using stamping polish
Apply nail art barrier around your nails to protect your skin from stamping polish.

Load your French tip stamping plate with white stamping polish.

Scrape gently at an angle to ensure even coverage.

Pick up the polish with a jelly stamper.

Carefully stamp it onto your nails.


If the placement isn't perfect, use non-acetone nail polish remover with an angled brush to clean and reshape the tips.

6. Seal the French tips
Apply smudge-free top coat over the entire nail, including the white tips. Let it dry for 5-10 minutes.
Once dry, apply the activator and dip top coat as you normally would.
Float the activator over your nails, avoiding pressing too hard to prevent smudging.

7. Final touches
After applying the top coat, allow your nails to fully dry.
If desired, you can go around the edges with a cuticle bit for a more polished look.

Cute and simple pink French tip nails
Your classic pink and white French tip manicure is now complete!
This method for creating French nail tip art is ideal for those with allergies to gel products or who prefer working with dip powders and stamping polish. With practice, you'll perfect your technique and enjoy the satisfaction of a professional-looking manicure at home!
Remember to leave a comment to let me know how you like this French tip nail idea.
Next, check out my Easy Builder Gel Tutorial for Healthy Natural Nails.
The author may collect a small share of sales from the links on this page.


Comments
Join the conversation