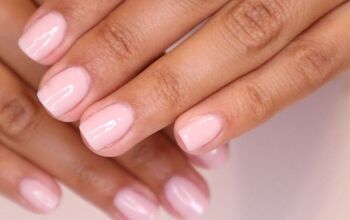
Dip Nail Tips for Beginners: How to Create Gorgeous Dip Nails at Home

Did you know that you don’t have to use gels to create gorgeous nail art?
You can also create stunning nail art with glitter.
Follow along for these dip nail tips for beginners where I will show you a simple way to use chunky glitter for cute nail designs.
Tools and materials:
- Chunky glitter
- Colored dip powder
- Clear dip powder
- Nail brush
- Orange wood stick
- Topcoat
- Tape
- Dip cups
- Nail file

1. Apply dip base
Before applying the dip base, wipe off most of it on the inside of the bottle. This helps prevent excess product from making a mess when you lay your nail flat.

2. Apply first layer of glitter
For the glitter application, dip your nail into the glitter powder for the first layer. You could also use a solid color if you prefer that to shimmers.

3. Clear away excess
Use an orange wood stick to gently remove any excess powder that has collected around your nail.

4. Brush away excess
Next, use a nail brush to gently remove any excess glitter from your nail.

5. Apply second layer of glitter
For the second layer, lay your nail flat and dip it again to ensure full coverage.
Remember, when applying dip powder, it’s better to use a higher number of thinner layers rather than fewer thicker layers.
Thinner layers are more durable and less likely to chip, crack, or lift.

6. Apply top coat
Seal your base colors with one layer of clear dip powder, followed by a clear topcoat. This step protects the base color and creates a smooth surface for applying glitter or nail art.
Only apply this to nails where you do not plan to use chunky glitter or additional nail art, as the clear dip powder and topcoat should be the final steps.

7. Apply first layer of chunky glitter
Pour your chunky glitter into a dip cup or a cupcake liner. This helps you control where the glitter is placed on your nails. For the initial dip, focus on applying a base layer of glitter without picking up too many chunky pieces.

8. Apply second layer of chunky glitter
For the second dip, mix the glitter in the cup to bring the chunky pieces to the top. Then, lay your nail flat into the glitter to ensure the chunky pieces are placed where you want them.

9. Press down glitter
After applying the chunky glitter, use a piece of tape on the opposite hand to press down the glitter pieces. This helps them sit nicely and adhere properly.
If, after laying your nail down for the second layer, you find that there aren’t enough chunky glitter pieces or they’re not in the desired spots, don’t worry.
You can simply apply extra dip base to the areas where the chunky glitter is missing and then manually place the glitter pieces where you want them.

10. Apply nail art
To prepare your glitter for nail art, start by pouring some of it onto a plate. Next, apply dip base to the areas of your nail where you want your design.
I covered half of my nail with extra dip base to create a swooping pattern with the tiny stars in the glitter. While the dip base is still wet, sprinkle the glitter onto your nail and arrange the stars to achieve the desired effect.

To place chunky glitter precisely, use a pointed tool like an orange wood stick. First, dip the pointy end of the stick into some dip base.
Then, use the dip base on the stick to pick up the chunky glitter, such as stars, and place them exactly where you want them on your nails.

11. Shape nails
Once the clear dip powder is applied, brush off any excess powder. Proceed with filing, buffing, and shaping your nails, and clean up around your cuticles for a neat finish.

12. Activate nails
Finally, activate your nails by applying a clear top coat.

How to do dip nails at home for beginners
And that is the end of our tutorial on how to do dip nails at home for beginners.
Above is the finished nail design: on my thumb and pointer finger, I applied a beautiful shimmery purple dip powder. My baby finger and ring finger feature striking chunky glitter. For my middle finger, I created a lovely nail art design with tiny shimmery stars arranged in a swooping pattern up the side of the nail.
What do you think? Comment down below.
The author may collect a small share of sales from the links on this page.


Comments
Join the conversation