Easy Makeup Tutorial: How to Do Glam, Smokey Eyes Step-by-step

In today's tutorial, we'll walk you through a step-by-step guide on how to achieve a classic and soft smokey eye, just like a professional.
We'll cover everything from the brushes you need, choosing the right colors, seamlessly blending tones, and much more.
You'll be surprised at how easy it is to achieve a professional-looking smokey eye, even if you're a beginner with makeup. Let's get started.
Upstyle Recommends!
Tools and materials:
- Under-eye masks
- Brow gel
- Brow pen
- Concealer
- Translucent powder
- Eyelid primer
- Fluffy crease brush
- Shader brush
- Precision crease brush
- Dense synthetic brush
- Pencil brush
- Lip brush
- Eyeliner pencil
- Liquid shadow
- Mascara
- False lashes
- Transition shade eyeshadow
- Darker crease eyeshadow
- Light lid eyeshadow
- Darkest tone eyeshadow
- Matte black eyeshadow
- Color corrector
- Brightening concealer
- Highlighting eyeshadow
1. Eye gel pads
The first step for a darker eye look, especially for special occasions, is to apply under-eye masks. These masks hydrate, firm, and de-puff the under-eye area, which is beneficial when working with darker shadow tones as they also catch any shadow fallout.

2. Brows
While not everyone starts with brows, doing them first frames the eyes, making it easier to map out eye makeup. Gel down your brows then sketch in individual hair strokes using a brow pen.

3. Primer
Color balance and prime your eyelids to ensure a smooth base for blending shadows and to prevent creasing. You can use a concealer set with powder or an eyelid primer if you have oily skin.
Apply the primer from the lash line to the brow bone and lightly dust translucent powder over it to avoid stickiness.

4. Shading the crease
Begin with a transition shade slightly darker than your skin tone to create depth in the crease. This acts as a base for building other shadows.
Use a fluffy crease brush to apply and blend the transition shade. Then, deepen the crease with a slightly darker shade, layering it over the transition shade.

5. Shading the lid
Once your crease is defined, use a clean shader brush to pack a lighter shade onto the lid. This brush is flat and designed for packing on color.
Sweep and press the light shade to brighten the eyelid. Save your darkest tone for the end to create a sultry, smokey effect.

6. Deepen the corners of the eye
Use a precision crease brush, smaller and denser than a fluffy crease brush, to apply the darkest shade, such as a dark chocolate brown.
Shade a V shape on the outer corner of the eye, blending from the lash line into the crease. This final layer adds sultriness to your smokey eye.

7: Illuminate the lid (optional)
For added drama, use a liquid shadow. Apply with a dense synthetic brush or your fingertips, patting it onto the lid. Ensure the product dries completely before opening your eyes to avoid creasing.

8. Creating a smoky liner
Create a smoky liner using a waxy pencil. Sketch the liner, thickening towards the outer eye. Use a pencil brush to blend the line, then set it with a matte black shadow.

9. Under eyes: prime, correct, and brighten
Apply a small amount of lip balm under the eyes for moisture. After foundation, use a color corrector. Blend and follow with a brightening concealer. Set with a translucent powder to prevent creasing.

10. Shading under the eyes
Mirror the shading technique used on the top lid under the eyes. Start with a transition shade using a shader brush, then layer with a darker crease color, and finish with a touch of matte black if desired. Highlight the brow bone and inner tear ducts for added brightness.

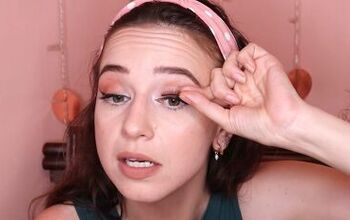
11. Adding lashes
Complete the look with mascara and, optionally, false lashes. Apply a final coat of mascara to blend your natural lashes with the false ones for a seamless look.

How to apply eyeshadow smokey eyes step-by-step
The finished look is glamorous, smoky, yet soft and wearable.

This step-by-step guide demystifies the smokey eye, making it accessible even for beginners. Whether you're aiming for an easy smokey eye or a more dramatic look, these tips ensure a flawless application every time.

Easy smokey eye makeup
By following this guide on how to apply eyeshadow smokey eyes step-by-step, you'll master the art of the smokey eye! How did you get on? Comment down below.
Next, check out my Insane Hack to Stop Makeup From Creasing Under Your Eyes.
The author may collect a small share of sales from the links on this page.


Comments
Join the conversation