Organize Your Purse With These DIY Twin Pouches

How would you like to organize your purse with pouches that have multiple pockets?
I’ll teach you how to make a DIY pouch so you can have an organized tote bag. This purse organizer is well-constructed with multiple pockets. It’s as practical as it is stylish.
Tools and materials:

1. Cut
Cut 2 pieces for the outer fabric at 9 by 16.5 inches and 2 pieces of lining at the same measurement. Cut 2 pieces of interfacing at 8 by 15.5 inches.

Measure 2 inches in and down on the corner of the interfacing.

Round the corner.

Fold the interfacing in half lengthwise and cut off the corner on the curve. Trace it on the second piece of interfacing to make the same cut.

Place the interfacing on the 2 pieces of outer fabric and iron.

Stack all the fabric and cut all the rounded corners tracing the shape of the interfacing.

2. Sew
Put the lining on top of the fabric with the right sides facing in. Sew the straight ends together on each set.

Open the lining and press the seam down.

3. Measure
Measure down from the seam on the side of the outer fabric 1.25 inches down. Then 1.25 inches below that. Mark those points.
Measure 4 inches down from the seam and draw a straight line 1 inch in from the side. Do the same on the other side. Then connect both sides.

4. Pocket
Place the outer fabric pieces together right sides facing in and sew around the bottom 3 sides of the square rectangle you just drew out.

5. Side one
Open the lining to both sides with one side over the outer fabric. Fold the lining and 1 piece of outer fabric up at both sides of the rectangle and pin them.

Fold the edges all the way to the bottom, then fold the bottom up twice and pin it up.

Measure 6 inches down on one side and mark it.
Then measure ¾ inch down from there and another ¾ from that point. Mark the same measurements on the other side.

Mirror those same measurements on the lining.

Back at the fabric, put a pin in each of the marked points on both sides. Fold the fabric to the first point.

Open and pull up and fold the lines to the second point.

Then fold the other half of the fabric up at the third point.

Clip the folds in place and pin the sides together.

Do the same folding with the marks on the lining, until it’s folded upwards. Clip or pin along the folds and edges.

Place the flaps of the tops facing each other and pin them together, leaving a 4-inch opening at the top.

Adjust the pins or clips to pin all the fabric together. Sew the sides leaving the 4-inch opening.

6. Side 2
Remove the pins and turn it right side out.

Repeat the process on the other side.


Turn it right side out, and iron it down.

Topstitch across the opening of the bag to sew the 4-inch openings closed.

7. Snap
To place a snap, fold the pouch in half lengthwise to find the center. Then put your snap in.


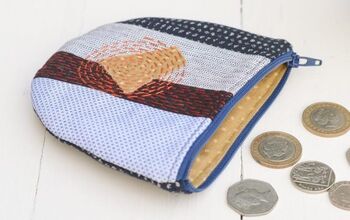
DIY pouch
I love this twin pouch tote organizer. Not only is this pouch adorable, but it’s practical too.
I hope you enjoyed this DIY tutorial.
Now you know how to organize a tote bag with an easy and convenient pouch.
Leave me a comment and let me know how your pouch came out.
Next, learn How to Sew a Soft Sunglasses Pouch.
The author may collect a small share of sales from the links on this page.


Comments
Join the conversation