Let's DIY a Seriously Cute 3 in 1 Bag From Scratch

This 3 in 1 bag design is an easy bag sewing pattern to make from simple rectangles of fabric.
Measure and cut the fabric carefully for the best results. There are no advanced sewing techniques required so it’s a suitable project for a confident beginner.
Tools and materials:
- Corduroy outer fabric
- Cotton lining fabric
- Fusible interfacing
- 19.75 inch (50 cm) double tabbed zipper
- 1 inch (2.5 cm) wide webbing strap
- 2 x 1 inch (2.5 cm) wide D rings
- 4x 1 inch (2.5 cm) wide swivel hooks
- Adjustable webbing shoulder strap
- Fabric marker
- Measuring tape
- Ruler
- Scissors
- Pins or fabric clips
- Sewing machine

1. Outer pocket
Cut two pieces of corduroy 9.5 inches by 6.75 inches (24 cm by 17 cm) and a piece of interfacing the same size.
Iron the interfacing to the wrong side of one of the corduroy pieces.

Use a tumbler to draw a curve on the lower corners of the interfacing.


Place on top of the second corduroy piece with the right sides facing.
Sew together with a half inch (1 cm) seam allowance, leaving an opening between the curved corners.
Trim the corners and notch the curves.

Turn the pocket right side out and top stitch the straight edge.

2. Bag outer
Cut two pieces of corduroy 20.5 inches by 17 inches (52 cm by 43 cm) and two pieces of both interfacing and lining to match.
Iron interfacing to the wrong side of both pieces.
Mark and cut out 0.75 inch (2 cm) squares at the corners of one of the longer sides on both corduroy and lining pieces. This will be the top edge of the bag.

Find the center of the top edge of one of the outer pieces and the center of the pocket.
Place the pocket centrally on the right side of the corduroy 5.5 inches (14 cm) from the top edge, and top stitch around the three sides.

3. Inside pocket
Cut a 12.75 inch (32 cm) square of lining fabric.

Fold it in half with the right side inside.
Sew around the open edges, leaving a gap on the lower edge.
Trim the corners, turn it right side out and top stitch the folded edge.

Place the pocket centrally on the right side of one of the bag lining pieces 5.5 inches (14 cm) from the top.
Top stitch in place around the three sides and up the center.

4. Insert the zipper
Place the zipper on the top edge of one lining piece between the cut outs, with the right sides uppermost.

Put an outer piece on top with the right side downwards.
Sew together along the top edge, with a 0.25 inch (0.7 cm) allowance.

Refold with the lining underneath and top stitch close to the zipper tape.

Place the top stitched section on top of the right side of the second lining piece.

Put the second outer piece on top with the right sides together.
Sew together along the top edge as before.

Separate the two lining pieces and top stitch the second side of the zipper.

5. Attach the D rings
Cut four pieces of corduroy 3.5 inches by 2 inches (9 cm by 5 cm).
Fold the short ends towards the middle with the wrong side inside.

Fold the pieces in half again and thread through the D rings and two of the swivel hooks.

Clip or pin the D rings to each end of the zipper tape and sew in place.

6. Assemble the bag
Line up the four layers of the bag with one right side uppermost.
Cut a 3 inch (8 cm) square from both bottom corners through all the layers.

Cut two pieces of webbing 8 inches (20 cm) long and seal the ends with an open flame.
Open the bag out flat.
Attach a strap to either side of the zipper, 7 inches (17.5 cm) from each side.

Secure by sewing in a square and across the diagonals.

Place the two outer and two lining pieces together with the right sides facing.
Attach the two swivel hooks between the sides of the outer pieces, 1 inch (2.5 cm) above the bottom cut-out.

Sew the side and lower edges together between the cut-outs, leaving an opening at the bottom of the lining.

7. Sew the base and top
Bring the edges of each cut-out together with the seams in the center of each side.
Sew the edges together.

Shape the top edge of the bag by smoothing out the fabric at both ends of the zipper tape and sewing it 0.5 inches (1 cm) from the edge.

Turn the bag right side out through the opening and sew the opening closed.
Tuck the lining inside the bag.

8. Shoulder strap
Buy or make a webbing shoulder strap and attach a swivel hook to each end.


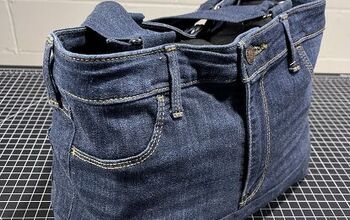
Cute DIY 3 in 1 bag
This is one of my most versatile bag design ideas.
Clip the shoulder strap to the top D rings to use the bag as a large tote bag.
Remove the shoulder strap and clip the D rings to the swivel hooks to make a roomy double-handed purse.
If you enjoyed this project, please let me know in the comments below.
The author may collect a small share of sales from the links on this page.


Comments
Join the conversation