How to Get Fuller Brows With Makeup

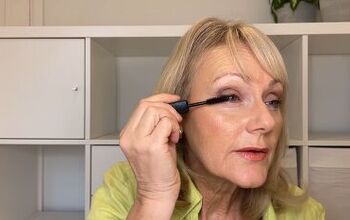
Hey guys, today I'm going to show you how to get gorgeous full brows using a new product by Urban Decay.
If you don’t have this product, that’s okay! Just grab something similar. Let's dive into this eyebrow tutorial and learn how to achieve thick, lush brows with makeup.
Upstyle Recommends!
Tools and materials:
1. Prep your brows
Start with clean, natural brows.
I used Urban Decay's Slick Day Brow for this tutorial. The first thing that stands out about this product is its unique comb. The comb is designed to coat every single hair effectively while also slicking them down due to its thin, closely set teeth.
2. Apply the brow gel
Begin by combing your brow hairs in the opposite direction and downward to coat the back of the hairs. This technique ensures that when you comb them back upright, the hairs stick to the skin better.
One key feature of this brow gel is that it's water-based, which prevents the crispy finish typical of many brow gels. This provides a hold without the crunchiness.
3. Shape your brows
Once you've coated the backside of the brow hairs, comb them upward and slightly diagonal. This avoids the overly surprised look that can come from combing them straight up.
Use a brow shaper tool to flatten the hairs against the skin.
4. Let the gel set
While the first brow dries, apply the brow gel to your second brow. It's important to let the gel set before using any pen or pencil to avoid ruining your brow pen with the still-wet gel.
5. Fill your brows in
Now that the gel has set, take your brow pen/pencil.
Starting at the front base of the brow, use light flicks upward to create a more defined baseline. Repeat the process for the top half of the brow.
Focus on filling in sparse areas to even out the fullness, rather than coloring in the entire brow.
6. Detail the tail
For the tail of the brow, change the direction of your strokes to match the natural angle of the hairs, extending the tail slightly if needed.
Use tiny hair-like strokes to maintain a natural look. You can soften the lines with a spoolie, if necessary, and go back with the brow gel if the hairs have moved.
7. Final adjustments
Repeat the process on your second brow. Once both brows are filled, compare them to ensure they are even. Make any final tweaks as necessary.
How to get full brows with makeup
And there you have it, a tutorial on how to make brows look fuller. The result is a natural, voluminous brow that frames your face beautifully.
This method works well for those with similar brow sparsity as mine. If your brows are sparser, you may need to fill in more areas.
How did you get on? Do your brows look fuller now? Comment down below.
Next, check out my Easy Lipstick Hack That Doubles The Amount Of Product.
Enjoyed the project?
The author may collect a small share of sales from the links on this page.


Comments
Join the conversation