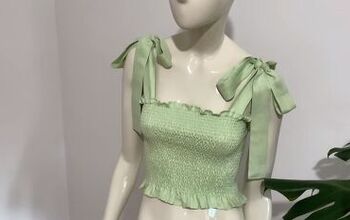
How to DIY a Cute Twisted Green Bustier Top for Summer

I needed a green bustier top to go with a favorite skirt. I wanted something more than a simple tube of fabric because I didn’t want to wear a bra with it. I came up with this bustier top sewing pattern that is so quick and easy to do that it will take you less than half an hour.
You need a good quality elastic fabric for this that stretches in both directions. I used a smooth stretch jersey. The measurements I give will fit size 38 European, which is small.
It’s very easy though to increase or decrease the length of the tube for other sizes.
Upstyle Recommends!
Tools and materials:
- Stretch jersey fabric
- Measuring tape
- Scissors
- Pins
- Sewing machine

1. Cut the fabric
Cut a rectangle of stretch jersey fabric 30 inches (75 cm) long by 14 inches (35 cm) wide.

2. Sew the basic tube
Fold the fabric in half lengthwise with the right side inside and sew the long edges together, using a straight stitch.
Keep the fabric smooth and flat as you sew and don’t stretch it.

3. Close the ends of the tube
Turn the tube of fabric right side out.
Sew the short edges from the seam to the fold at each end.

4. Make the twisted front
Lay the tube of fabric flat with the right side out.
Mark the center of the long edge.
Fold the two short ends in so they meet in the center of the tube.

With the ends of the fabric touching, move the short edges diagonally apart so they are offset by about one third to one half of their length.

Pick up the two edges that are touching each other and hold them together.

Wrap the free end nearest to you around the ends from left to right.

Place it behind the other front edge and line up the raw edges. Hold the three layers together.

Repeat the movement with the free edge farthest away from you, wrapping it around the end from right to left.

Line up the edges with the others.
Hold all four layers together and pin them.

Sew the layers together, stitching outside the previous row.

5. Finishing
Open out the seam from the inside and gently separate the layers.

Smooth out and arrange the front pleats until the twist becomes apparent.


DIY twisted green bustier top
The twist front is so flattering and will shape your bust beautifully. It also works great with a strapless bra, if you prefer to wear one.
I made mine as a crop top but you could easily make the bustier deeper if you don’t want to show as much skin.
Just make you use a good quality stretch fabric so that it fits you well and you’re not worried about it slipping down. If you have a larger bust, you may prefer to add thin shoulder straps.
I hope you enjoyed seeing how to sew a bustier top. Please leave me a comment below and let me know.
I have lots more great sewing projects for beginners and advanced sewists.
Follow me on TikTok to see all of them: https://www.tiktok.com/@tugbaisler
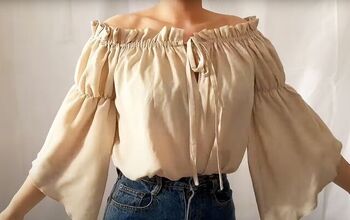
Next, learn How to Sew a DIY Bardot Top With Cute Puff Sleeves.
The author may collect a small share of sales from the links on this page.


Comments
Join the conversation