Easy Shorts Sewing Pattern Tutorial

Today, I’m going to show you how to sew shorts step-by-step with a really easy shorts sewing pattern that you draw directly onto the fabric.
My shorts are size 38 European, or Small, but I’m including the measurements for sizes Medium, Large and Extra Large as well.
Just follow my step-by-step instructions and you’ll have a new pair of comfortable DIY shorts to wear in less than an hour.
Tools and materials:
- 2/3 of a yard (58 cm) of 60 inch (152 cm) wide non-stretch fabric
- 2 inch (5 cm) wide elastic
- Pins
- Fabric marker
- Ruler
- Scissors
- Sewing machine
- Serger (optional)

1. Cut out the basic shorts pattern
Fold your fabric in half lengthways so the two selvedges are together. Then fold it in half again in the same way so you have four layers.
Place the fabric in front of you with the main fold towards you.
Pin the layers together.

For sizes S and M, measure 15.75 inches (40 cm) along the fold from the right edge. Make this measurement 16.25 inches (41 cm) for size L and 16.5 inches (42 cm) for XL.

Measure the same distance from the right side along the other long edge and join the marks with a straight line.

Mark 11 inches (28 cm) from the fold along the right edge for sizes S and M. This will be 11.5 inches (29 cm) for size L and 12 inches (30 cm) for XL.

Draw a line joining this mark to the first line at a right angle.

For the crotch curve, measure 4 inches (10 cm) up this second line from the corner for sizes S and M, 4.5 inches for size L and 5 inches (12 cm) for size XL.
Draw a curved line from this point to the end of the first line.

Mark the leg width of 13.75 inches (35 cm) for sizes S and M, 14.2 inches (36 cm) for L and 14.5 inches (37 cm) for size XL from the fold along the left edge.

Join this mark to the end of the first line as well and cut out the shorts.

2. Shape the front shorts
Open out the fabric into two layers.
Measure (4 cm) down from the waist on the right side for sizes S and M. Make this (5 cm) for size L and (6 cm) for XL.

Draw a tapered line from this point to the top of the waist edge at the other end.

Cut along this line and also trim half an inch (1 cm) from the inner leg seam on the right.
The lower waist edge is at the front of the shorts.

3. Assemble the shorts
Place the two pieces together with the right sides facing.
Sew both crotch seams.

Use your serger to sew the seams or finish the raw edges with an overlock or zigzag stitch on your sewing machine.

Refold the shorts so the crotch seams are in the center.
Sew the inner leg seam, matching the crotch seams.
Finish all the raw edges.

4. Elastic waistband
Cut a piece of elastic 24 inches (60 cm) long or to fit comfortably around your waist.
Join and overlock the ends.
Turn the shorts right side out.

Divide the waist edge into four and mark the four points with pins.
Fold the elastic into four and mark the edges.

Pin the elastic inside the waist edge at the four marks, with the elastic seam at the center back.

Sew or serge the elastic to the top of the waist edge, stretching it between the pins.

Fold the waist edge to the inside and stitch it down along the same edge, stretching it as you sew.
Make sure to stretch it by the same amount so the waistband doesn’t twist.

5. Finishing
Overlock or serge the lower edge of each leg.
Turn up a half inch (1 cm) hem and sew it in place.


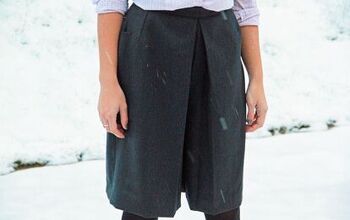
DIY shorts
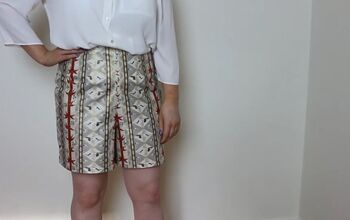
And there you have it! A pair of comfortable, wide legged DIY shorts.
Don’t be afraid to adjust the length so they end at the most flattering point on your thighs.
Now you know how to make shorts the easy way, you can sew them in different fabrics and lengths and they’ll always fit you well.
Please let me know what you think of them in the comments below.
Next, learn How to Sew a Gorgeous Harem Jumpsuit From Scratch.
For lots more step-by-step sewing patterns and tips, please also follow me on TikTok: https://www.tiktok.com/@tugbaisler
The author may collect a small share of sales from the links on this page.


Comments
Join the conversation