Reverse Nail Stamping Tutorial: Create Gorgeous Burnt Orange Nails

Reverse nail stamping is a simple yet effective technique to create intricate and beautiful nail designs, even without advanced art skills.
It's especially great for short nails and works perfectly with dip powders, giving you long-lasting, professional-looking results.
Follow with me to learn how to create beautiful burnt orange and gold nails.
Tools and materials:
- Dip powder (burnt orange, clear, glitter optional)
- Dip base
- Dip activator
- Dip top coat
- Stamping plate with desired design (e.g., leaves)
- Stamping polish (various colors for filling in)
- Jelly stamper
- Scraper
- Sticky base coat
- Toothpicks or thin nail art brushes (for coloring in design)
- Acetone (for cleaning stamping plate)
- Tape or lint roller (for cleaning up excess polish)
- Nail file and buffer
- Stiff nail brush
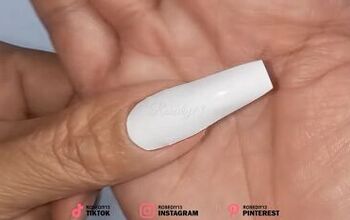
1. Prepare your nails with dip powder
To start, you’ll want to apply a dip powder base. For this fall-themed look, a burnt orange dip powder is ideal as a foundation.
Apply a thin layer of dip base to your nails, making sure not to use too much product to avoid flooding your cuticles or sidewalls. If you get dip base on the skin, quickly clean it off with an orange stick or a nail tool.
Next, dip your nail into the burnt orange powder, angling it at 45 degrees for even coverage. Tap off any excess powder, and repeat the process for a second layer if needed.
To ensure durability, apply a final layer of clear dip powder. This will protect the color and glitter layers, making it easier to file and buff your nails without damaging the design.
Once you’ve applied the clear dip powder, brush off any leftover powder and activate the nails to harden them. Use a nail file to gently buff the surface and shape the nails to your liking.

2. Pick up the stamping image
With your nails prepped and ready, it’s time to learn how to use nail stamps.
Choose a stamping plate with a design you want, such as fall leaves for a seasonal look. Using a high-quality stamping polish, apply a small amount to cover the entire image.
Stamping polish is different from regular nail polish; it’s thinner but more opaque, ensuring a crisp, clean design when transferred.
Scrape the excess polish off the plate at a 45-degree angle, moving quickly and firmly. Immediately roll your jelly stamper over the plate in the opposite direction of your scrape to pick up the image.
If the design doesn’t transfer perfectly, don’t worry. Simply clean the plate with acetone and try again.
Clean up any unwanted parts around the image on the stamper using a piece of tape.

3. Reverse nail stamping – coloring in the design
Once the image is on your stamper, allow it to dry completely before you begin filling it in.
Reverse stamping is all about coloring in the design, and you can use toothpicks or thin nail art brushes to do this.
For a fall look, you might want to fill in the leaves with gold polish, creating a beautiful contrast against the burnt orange base. Be patient during this step to ensure precision and a smooth application.
After you’ve colored in the design, let it dry again. The image must be fully dry on the stamper before you attempt to transfer it to your nails.

4. Transfer the design to your nails
Once your design is fully colored and dry, apply a sticky base coat to your nails. Use a product like Maniology sticky base, applying it to the area of your nail where you want the design to be placed. Wait until the base becomes tacky, but not wet or dry.
Carefully press the jelly stamper onto your nail, rocking it gently back and forth to ensure the entire design transfers evenly.
Be sure to press down completely before lifting the stamper, as any part of the design that doesn’t adhere to your nail will remain on the stamper.

5. Seal your design with a top coat
To protect your stamped design, apply a smudge-free top coat. This will seal the image and prevent it from smudging or fading. Allow the top coat to dry for at least 5-10 minutes.
After the smudge-free top coat has dried completely, you can finish the process with dip liquids. Apply the activator and two layers of dip top coat to seal everything in, following the specific instructions for the dip liquids you’re using.
Float the activator over the nails and apply the top coat evenly for a glossy, durable finish.

Final tips for success
When using reverse stamping, don’t be afraid to experiment with different designs, colors, and glitters. Short nails can look amazing with glitter, so try using fine or medium chunks for a more subtle effect.
Remember, patience is key, especially when coloring in the designs and waiting for everything to dry.

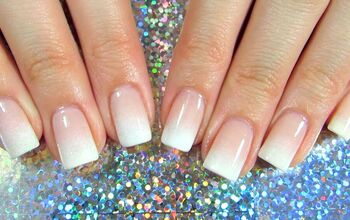
Reverse nail stamping
With these simple steps, you can achieve professional-looking reverse stamped nails. These burnt orange nails are so cute and are perfect for autumn.
Whether you’re creating cute fall designs or experimenting with other themes, reverse stamping is a versatile and beginner-friendly technique that will elevate your dip manicures.
What do you think? Comment down below.
Next up, check out my Easy Builder Gel Tutorial for Healthy Natural Nails.
The author may collect a small share of sales from the links on this page.


Comments
Join the conversation