How to Sew Comfy Palazzo Pants From Scratch

Hi everyone! Let's learn how to sew palazzo pants.
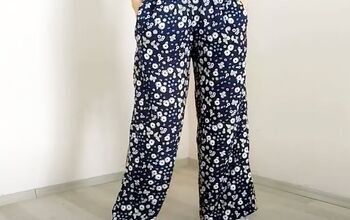
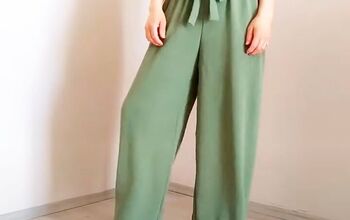
If you’re wondering what palazzo pants are, they have wide, straight legs and a relaxed style.
These ones have an elasticated waist and curved side seam pockets and they’re easy to sew from my detailed instructions.
My main measurements are for size 38 European (S) but I also give the figures for sizes M and L where they differ.
Tools and materials:
- Light to medium weight fabric 44” by 96” (110 cm by 240 cm)
- 3/4” (2 cm) wide elastic
- Fabric marker
- Ruler
- Measuring tape
- Pins
- Scissors
- Large safety pin
- Sewing machine
- Serger (optional)

1. Palazzo pants sewing pattern
Trim the fabric to 42” (107 cm) by 56” (140 cm) for size S.
Fold your fabric in half widthwise and in half again. Place it flat with the main fold towards you.

Mark 11.5” (29 cm) along the fold from the right edge and draw a line across the fabric at this point for the crotch length.


Measure 10.2” (26 cm) from the fold along the right edge and join that mark to the first line.
Draw a curved line at the corner where they meet.

Measure 13” (33 cm) from the fold along the left edge and join the mark to the front of the crotch.

Draw a line parallel to the folded edge and half an inch (1 cm) from it.

Cut out the front edge of the pants.

2. Shape the front section
Open out the first fold.
Mark 2” (5 cm) down from the waist edge at the front crotch.

Draw a tapered line from the mark to the waist edge at the back crotch and cut out.
Trim half an inch (1 cm) from the front inside leg seam.

Separate the front and back sections at the side seam.

3. Cut out the pockets
Put the back pants sections to one side.
Cut a strip of fabric 33” (84 cm) by 10” (25 cm).

Fold it in half and half again and place the main fold towards you.
Slide the folded fabric under the side edge of the pants front, lining up the side seam with the fold.

Trim off the excess fabric at the waist edge.

Separate the pocket pieces along the fold and cut the lower and front edges into a curve.

4. Insert the pockets
Put two of the pocket pieces aside for the back pockets.
Pin the other two in place under the pants front.
Measure 2.4” (6 cm) along the waist edge from the side seam.

Mark 5” (13 cm) down the side seam from the waist edge and join the two marks with a curved line.
Cut along the curve through all layers for the front pockets.

Place one of the front pocket pieces on one of the pants fronts with the right sides facing.
Sew along the curved edge.

Fold the pocket to the inside and top stitch along the curve on the right side.

Place a back pocket piece on top of the front one, with the right sides together.

Sew the two pocket pieces together along the long curved edges, without stitching them to the pants.

Pin the straight edges of the pocket bags to the waist and side edges of the pants and sew in place from the right side.
Repeat for the second pants front.

5. Assemble the pants
Place the two fronts together with the right sides facing and sew the center front crotch seam.
Join the two back pieces in the same way.

Place the backs and fronts together with the right sides facing.
Match the crotch seams and join the inside and outside leg seams.

6. Waistband
Cut a strip of fabric 40” (100 cm) long by 4” (10 cm) deep.
Join the short edges into a circle, with the right sides together.

Open the seam flat and fold the waistband in half lengthwise with the wrong side inside.
Pin the folded waistband to the right side of the pants, matching the waistband seam to the center back seam of the pants.
Sew along the raw edges, leaving an opening for the elastic.
Cut a piece of elastic 25” (63 cm) long or the length to fit comfortably around your waist.
Use a safety pin to thread it through the waistband.
Join the two ends of the elastic and sew the opening closed.

7. Finishing
Serge the raw edges of the waistband or use an overlock or zigzag stitch on your machine.

Overlock the bottom of the legs and turn up a 1” (2.5 cm) hem.


DIY palazzo pants
I hope you enjoyed seeing how to sew pants from scratch, even without a pattern. This is my favorite style of pants because they’re so comfortable to wear. I’ve made them in many different fabrics.
I’d love to hear if you enjoyed this tutorial. Please drop me a comment below and tell me what you think.
To see more of my great patterns and ideas, follow me on TikTok: https://www.tiktok.com/@tugbaisler
Next, learn How to Make a Cute and Easy Pleated Skirt From Old Pants.
The author may collect a small share of sales from the links on this page.


Comments
Join the conversation