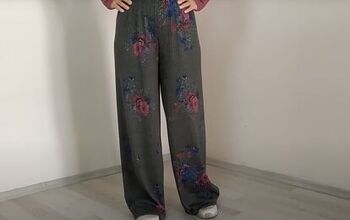
Free and Easy Flare Pants Pattern Tutorial

Flared pants are trendy and super comfortable to wear. My flare pants sewing pattern comes in six sizes, from XS to XXL. They are tight-fitting, so make sure you use a fabric with 60% stretch.
Tools and materials:
- Fredi flare pants pattern
- 1 - 2 yards (1 - 2 m) 60% stretch fabric
- 2 inch (5 cm) wide elastic
- Paper for pattern
- Tape
- Scissors
- Pins
- Sewing machine
- Serger (optional)

1. Cut out the fabric pieces
Print out the pattern, cut out your size and tape the sheets together.

You need to cut both pattern pieces twice and mirrored, so you end up with two mirrored fronts and two mirrored backs.
Be sure to transfer the notches from the pattern to the fabric. Matching these is vital when putting the pants together.

2. Sew the crotch seams
Place the two fronts together with the right sides facing.
Pin the crotch seam together, aligning the notches.
Do the same with the two back pieces.
Sew both crotch seams using your serger, or a stretch stitch on your sewing machine.
If your fabric is fraying, finish off all the seam allowances with an overlock or zigzag stitch.

3. Sew the outside leg seams
Open out the two pieces.
Lay them on top of each other with the right sides together.
Pin and sew the two outer side seams together from the waist to the hem.
Align the notches carefully so the seams don’t pull or twist.

4. Join the inner leg seams
Spread the legs apart and align the crotch seams.
Pin and sew the inner leg seams outwards from the crotch to the hem on each leg, again being careful to align the pattern notches.

5. Measure the elastic
Try the pants on.
Turn down the waist edge to the level you want.

Measure the length of elastic over the waistband so that it fits comfortably around your waist.
Overlap the ends and sew them securely together.
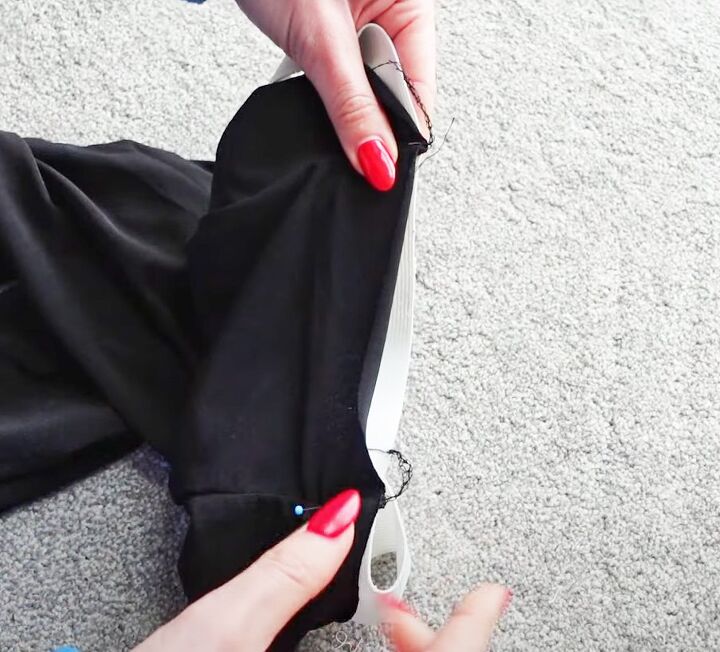
6. Elastic waistband
Divide the circle of elastic into four equal parts with pins.
Pin the elastic sections to the front and back crotch seams and the two side seams inside the flares, aligning the top edge of the elastic to the raw edge of the waist.
Sew in place with your serger or using a stretch stitch, stretching the elastic to fit as you sew.

Fold the waistband over to the inside.
You can either top stitch it down, or sew the bottom of the elastic to the four seams.
If you decide to top stitch the waistband, make sure to stretch the elastic as you sew over it so it remains stretchy.

7. Hem the legs
Try the pants on again and decide on the length you want.
You can finish the pants with a single or double hem, or use bias tape for a bound hem.
I overlocked the raw edges and turned up a simple single hem.

Flare pants pattern tutorial
The Fredi flared pants pattern makes great activewear pants as well as smart flares for going out. They’re a very versatile piece that you’ll get a lot of wear from.
I also made a pair in patchwork with exposed seams, and I’m completely obsessed with these!
Which is your favorite? I love to read your comments and questions, so please drop me a line below.
Next, check out my tutorial on Upcycling a Leather Jacket Into a Gorgeous Bucket Bag.
The author may collect a small share of sales from the links on this page.
![Swing Dress Pattern & Tutorial [Easy & Free!]](https://cdn-fastly.upstyledaily.com/media/2020/12/20/6348151/swing-dress-pattern-tutorial-easy-free.jpg?size=350x220)


Comments
Join the conversation