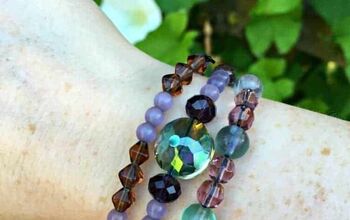
DIY Stacked Beaded Bracelet
Learn how to make a DIY Stacked Beaded Bracelet with simple supplies from the craft store. Have you always wanted to create custom jewelry but didn't know where to start? This step-by-step tutorial will teach you exactly how to make a trendy layered bracelet with a variety of gold beads.

This multi-strand bracelet with beads makes the perfect gift and is ideal for a crafternoon with your girlfriends. It is easy to make and goes together in about an hour.
Are you looking for more easy jewelry projects like this? Check out our full list of wearable crafts for kids (and adults) of all ages to create.


This post, DIY Stacked Beaded Bracelet, contains affiliate links. Using links to these sites means I will earn a percentage of the purchase at no extra cost to you.

Here's what you need to make a Beaded Bracelet
- Beads in a Variety of Sizes and Shapes
- Stringing Wire
- Multi Strand Connectors
- Lobster Claw Clasp
- Jump Ring
- Crimp Beads
- Wire Cutters
- Needle Nose Pliers (2)
- Ruler
- Small Shallow Dishes
I already had most of these supplies in my craft stash from other jewelry-making craft projects, but if you are a beginner, then this Jewelry Making Supply Kit is perfect. Boasting over 1400 pieces, it includes the tools and findings to get you started in the right direction without breaking the bank.
Here's how to create a Stacked Bracelet

STEP ONE
To begin the DIY Stacked Beaded Bracelet, gather all supplies. Measure and cut five sections of stringing wire that are 2″ longer than your wrist.
Slide a crimp bead on the first strand of wire, then thread through the first ring on the multi-strand connector. Loop the wire back through the crimp bead, leaving about 1″ of the wire. Using needle nose pliers press hard and crimp the bead closed over the wires, leaving a loop at the ring connector end.
Repeat for the next four wires and connector rings.
One of my go-to jewelry-making supplies is this Design Board from Beadsmith. It has multiple channels, a soft surface, and measurements included to make bracelet and necklace projects quick and easy. This board also has compartments for different beads or jewelry findings and a cover, so you can set your project aside and have it not be disturbed.

STEP TWO
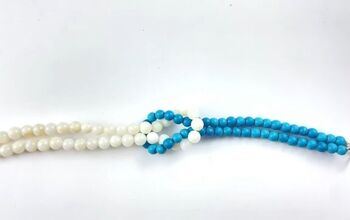
Thread beads onto the first wire until the length is the circumference of your wrist. Make sure that the first few beads are threaded on the main wire and the cut end, hiding the wire tail. The first strand is a combination of smooth and rough larger gold beads.
Slide a crimp bead on the end of the strand of wire, then thread through the first ring on the second multi-strand connector. Loop the wire back through the crimp bead, and several gold beads, leaving about 1″ of the wire. Using needle nose pliers pull on the tail of the wire to make a smaller loop. Then press hard and crimp the bead closed over the wires, leaving the loop at the ring connector end.
Using wire cutters, trim the tail of the wire as close to the beads as possible.

STEP THREE
Thread beads onto the first wire until the length is the circumference of your wrist. Make sure that the first few beads are threaded on the main wire and the cut end, hiding the wire tail. The second strand is a smaller and smooth gold bead.
Slide a crimp bead on the end of the strand of wire, then thread through the first ring on the second multi-strand connector. Loop the wire back through the crimp bead, and several gold beads, leaving about 1″ of the wire. Using needle nose pliers pull on the tail of the wire to make a smaller loop. Then press hard and crimp the bead closed over the wires, leaving the loop at the ring connector end.
Using wire cutters, trim the tail of the wire as close to the beads as possible.

STEP FOUR
Thread beads onto the first wire until the length is the circumference of your wrist. Make sure that the first few beads are threaded on the main wire and the cut end, hiding the wire tail. The third strand is a fun cube-shaped gold bead.
Slide a crimp bead on the end of the strand of wire, then thread through the first ring on the second multi-strand connector. Loop the wire back through the crimp bead, and several gold beads, leaving about 1″ of the wire. Using needle nose pliers pull on the tail of the wire to make a smaller loop. Then press hard and crimp the bead closed over the wires, leaving the loop at the ring connector end.
Using wire cutters, trim the tail of the wire as close to the beads as possible.

STEP FIVE
Thread beads onto the first wire until the length is the circumference of your wrist. Make sure that the first few beads are threaded on the main wire and the cut end, hiding the wire tail. The fourth strand is a tube-shaped fluted gold bead.
Slide a crimp bead on the end of the strand of wire, then thread through the first ring on the second multi-strand connector. Loop the wire back through the crimp bead, and several gold beads, leaving about 1″ of the wire. Using needle nose pliers pull on the tail of the wire to make a smaller loop. Then press hard and crimp the bead closed over the wires, leaving the loop at the ring connector end.
Using wire cutters, trim the tail of the wire as close to the beads as possible.

STEP SIX
Thread beads onto the first wire until the length is the circumference of your wrist. Make sure that the first few beads are threaded on the main wire and the cut end, hiding the wire tail. The fifth strand is a medium size smooth gold bead.
Slide a crimp bead on the end of the strand of wire, then thread through the first ring on the second multi-strand connector. Loop the wire back through the crimp bead, and several gold beads, leaving about 1″ of the wire. Using needle nose pliers pull on the tail of the wire to make a smaller loop. Then press hard and crimp the bead closed over the wires, leaving the loop at the ring connector end.
Using wire cutters, trim the tail of the wire as close to the beads as possible.

STEP SEVEN
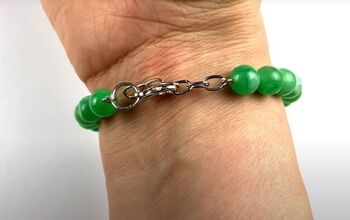
Carefully open a jump ring using 2 sets of needle nose pliers, twisting rather than pulling apart. Slide the lobster claw clasp onto the jump ring and then slide the first multi-strand connector onto the jump ring. Close the jump ring by twisting the ends back together with 2 sets of needle nose pliers.
Repeat the above step to add a jump ring to the second multi-strand connector. Open the lobster claw clasp and attach the trendy stacked bead bracelet to your wrist.

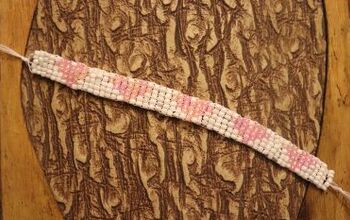
Easy Beaded Bracelet Stack
Mix and match the size, design, and color of the beads to create a custom DIY Stacked Beaded Bracelet for yourself or a friend. The possibilities are endless! If you have very small or larger wrists, this tutorial is a perfect solution to bracelets that just don't fit. A visit to the craft supply store is a fun way to pick out a variety of beads that reflect your personality.

Sharing is Caring!
Too busy to make this right now? Pin it for later! I’d love for you to pin this project to your favorite craft board on Pinterest and then it’ll be waiting for you when you’re ready.
Visit my website Creatively Beth for a TON of Craft Tutorials, Home Decor DIYs, and FREE Printables.
Thanks for stopping by!
Creatively, Beth
The author may collect a small share of sales from the links on this page.


Comments
Join the conversation