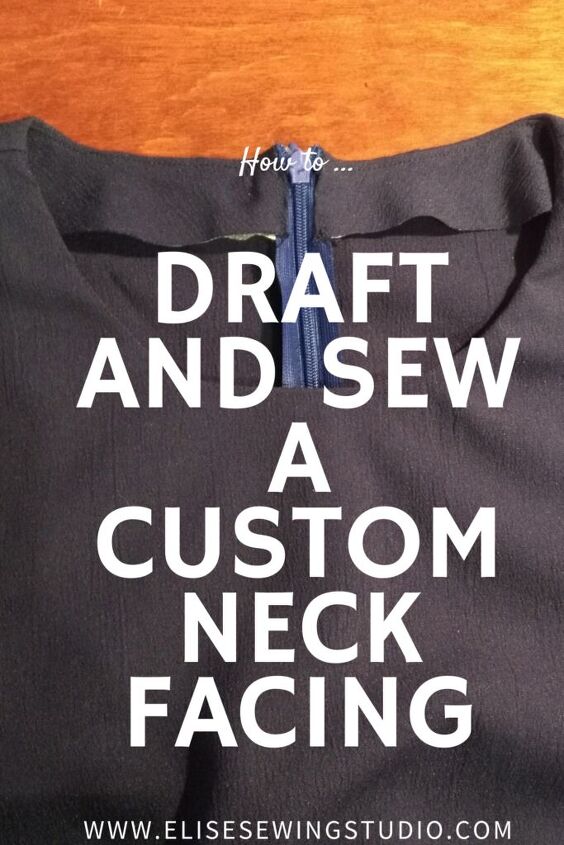
How to Draft and Sew a Neck Facing

Learning how to make a neck facing pattern from an existing bodice pattern means that you aren’t limited by the shape of the neck in that particular pattern. If you want to change the shape or depth of the neckline, once you know how to make a facing pattern you can alter the shape of the neckline in your shirt or dress pattern.
If you want to skip how to draft a facing pattern and just want to lean how to sew a facing in a neckline, skip to the part where we start to cut and sew it .
This article contains affiliate links. This means if you click on a link and later make a purchase, I receive a small commission at no extra cost to you.
- Paper
- Pencil, mechanical or very sharp HB pencil
- Good eraser
- Ruler
- Tape measure
- Tape
- Fusible interfacing for when we cut and make the facing on fabric
There are other supplies for pattern drafting that I use that are optional, but great if you get into pattern drafting as I find it makes drawing the curves and seam allowance a little easier:
- French Curve
- Flexible edge
- Seam Gage
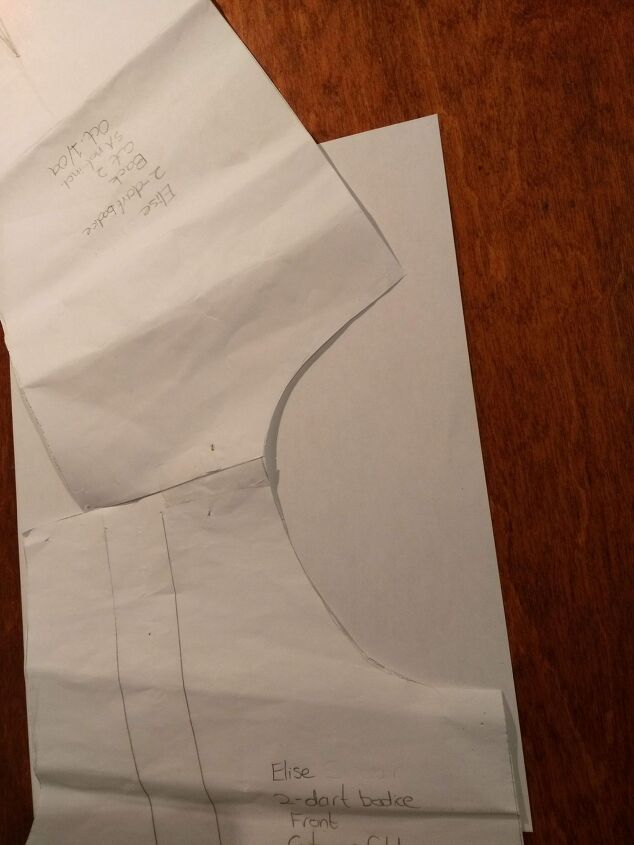
Lay your pattern for the front and back of the bodice flat on your table, matching the shoulder seam at the neck. Lightly tape together.
If your pattern includes seam allowance, line it up so the seam lines are touching on the front and back pieces (overlap the seam allowance on the shoulder seam). The pattern I’m using as an example does not include seam allowance.
If you want to change the shape of the neckline, this is the step to do it. Wish the neckline was higher, lower, more or less scooped?
Place and tape a piece of paper underneath the neck opening if you want to draw a higher neckline, or sketch out a lower or more scooped out neckline on your pattern. Add seam allowance (I’m using a 1/4″ seam allowance in this tutorial).
If you change your neckline, just make sure that it matches at the shoulder where the front and back pieces touch. This ensures that the neckline flows smoothly from the front to the back after you assemble your bodice.
Put a piece of paper underneath the pattern at the neckline and lightly tape your pattern to it. Trace the entire neckline, front and back so you have one smooth curve on the paper.
Put a mark where the shoulder seam is, and mark the centre front and centre back as well.
(Quick note: this tutorial uses some technical language like grainline, etc. If you want a primer on this, read my article Sewing and Pattern Drafting Terms).

Drafting the neck facing
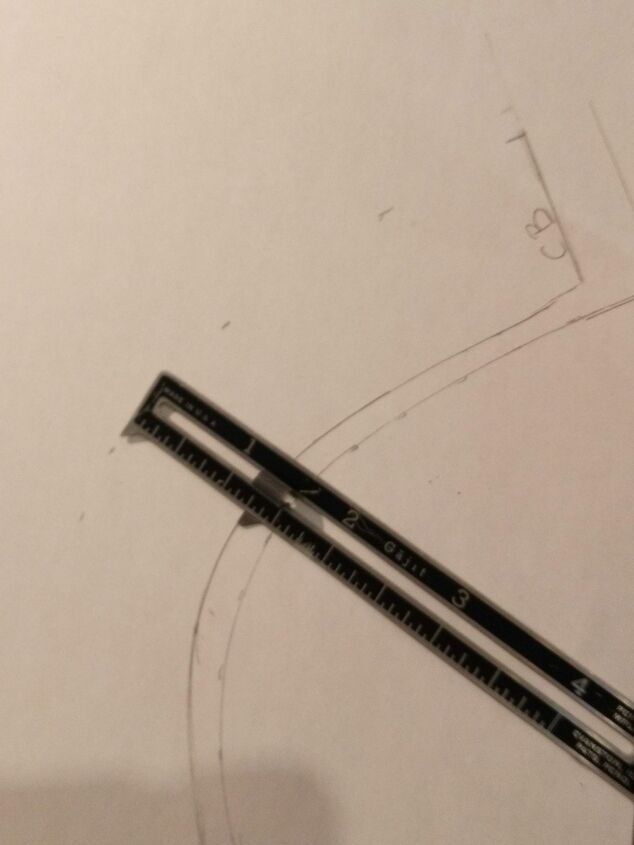
Add seam allowance. I’m using 1/4″ on my facing and the neckline on my pattern pieces. If your pattern is using a different seam allowance along the neckline, make the seam allowance on your facing the same as the seam allowance on your pattern’s neckline.
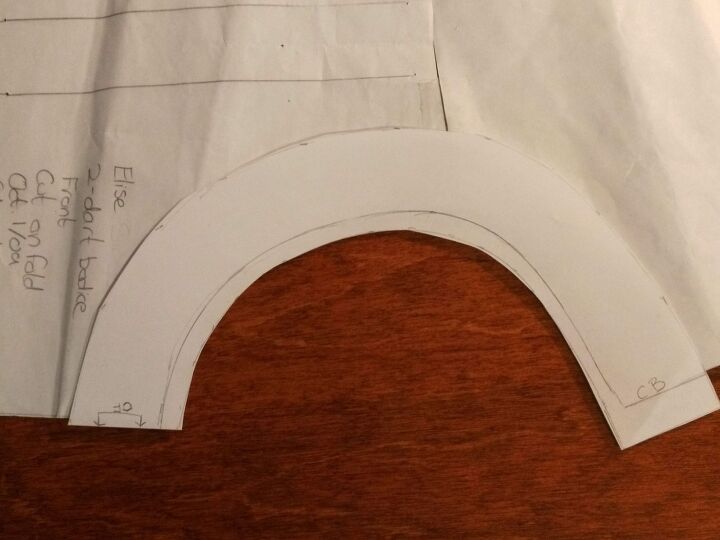
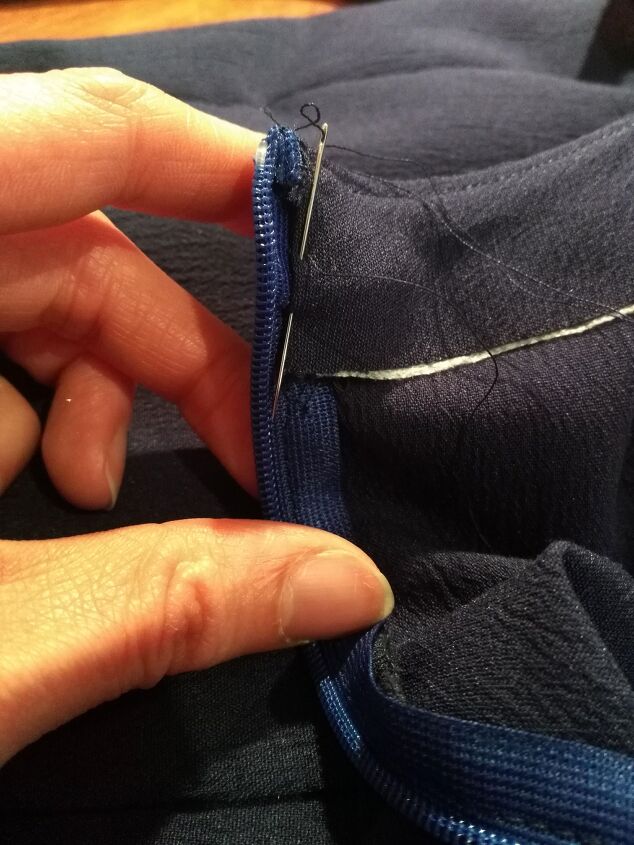
We need to pay attention to whether or not your neckline has an opening – my bodice is cut on the fold on the front, and has a zipper in the centre back. So my neck facing pattern needs to be cut on the centre front fold and have an opening in the back.
Where the opening is for the zipper, my pattern going to use 1/2″ seam allowance, so I am going to add the same seam allowance (1/2″) to the opening of my facing where it will meet the zipper.
Your bodice may have no opening (pull over style), or may be open in the front.
If it opens in the front, do the same thing as above but with the same seam allowance on the front opening that your bodice uses. If your bodice has no neck opening and pulls on over the head without buttons/zipper/etc, you need a front and back facing piece.
Do the same thing for the neckline as above, but you will have a front pattern piece and a back pattern piece, both cut on the fold.
You will need seam allowance on the shoulder seam, the same width allowance as what is in the shoulder seam allowance on your pattern.
The important thing is that your facing matches your neckline’s seam allowance and neck opening.
Draw your neck facing, I am using 1.5″, which is fairly standard but you can make it narrower if you wish. You do not need to add more seam allowance to the facing on the side opposite the neck.
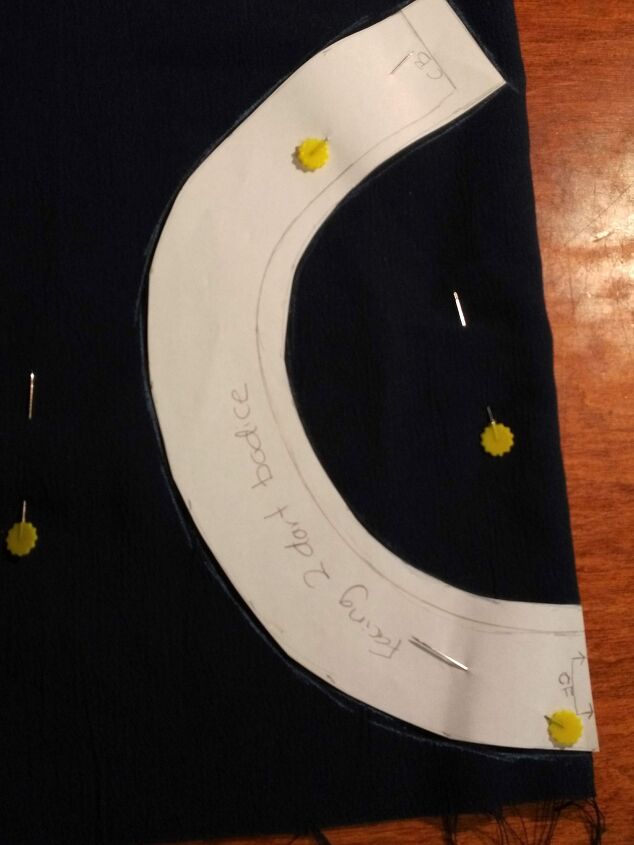
Cut the facing pattern out of the paper. Check it by placing it on top of your bodice pattern neckline to make sure it lines up and has the correct seam allowance.
Place the facing pattern on your fabric. Where my bodice is cut on the fold on the centre front, I am folding my fabric along the grainline and placing my pattern here and cutting out on double thickness of fabric.
If your bodice has no opening, cut your front and back pieces on the fold.
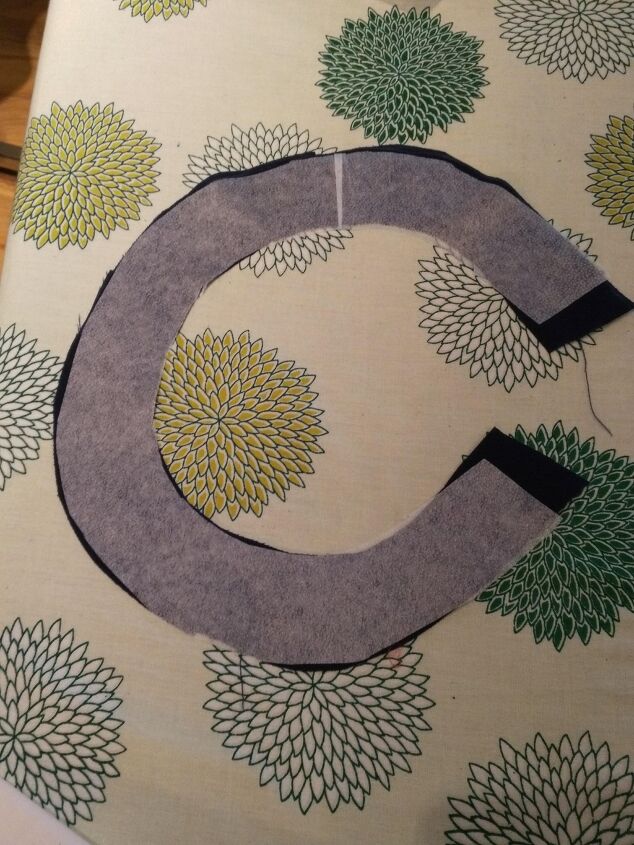
Cut out fabric and interfacing. Apply interfacing.
You will need to cut your facing out of fusible interfacing as well. You don’t need the seam allowance on the neckline side.
Apply the fusible interfacing to the wrong side of your fabric. The inner neckline edge does not need interfacing in the seam allowance (where it will be sewn to the bodice neckline). The interfacing on the outer edge of the facing stops the facing from fraying, so you can skip serging or finishing the edge of the fabric here. You may wish to use pinking shears on the outside edge if you have them (I don’t).
If you have a front and back facing piece, sew them together at the shoulder seams and press the seam open.

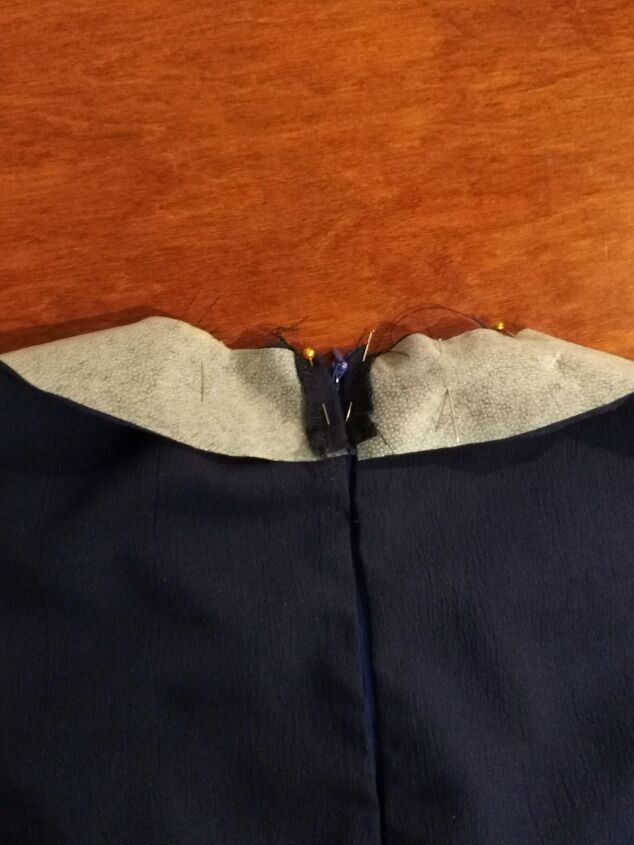
Pin on neck facing
Using pins, mark the centre front and centre back on your facing and bodice. Pin the facing on to your garment, right sides together, matching up the centre front and back and shoulder seams first on your bodice and facing. Sew.
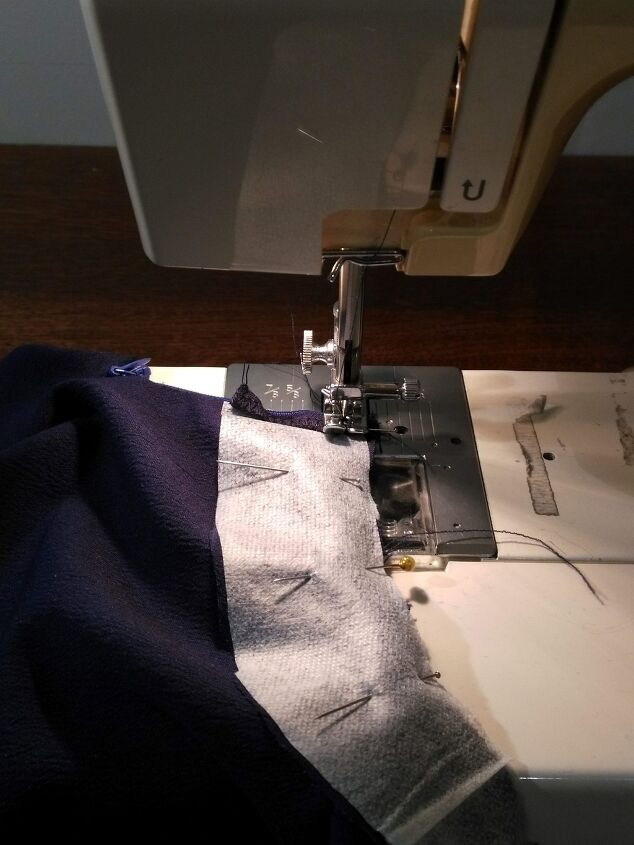
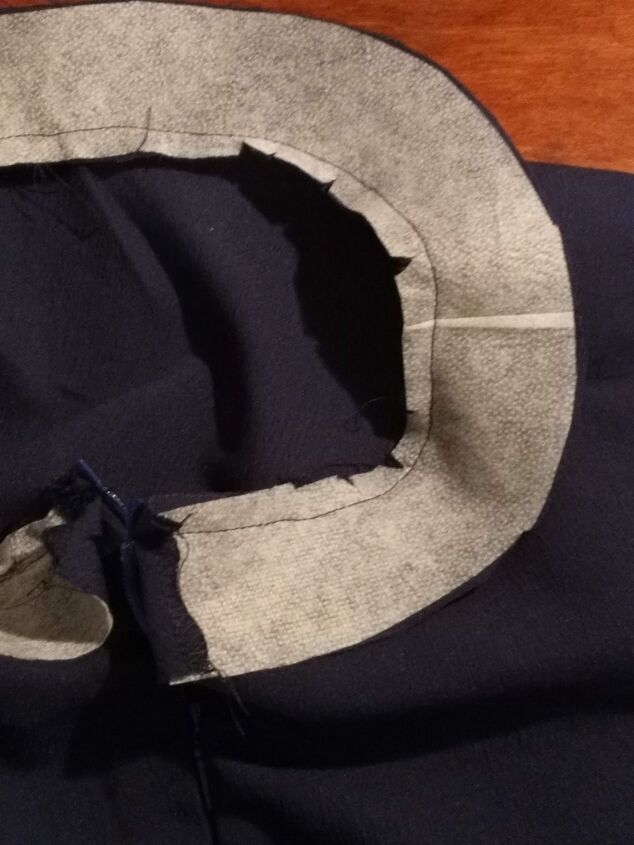
Sew on the neck facing and notch the seam allowance.
Notch your seam allowance in the curves of the neckline, being very careful not to cut your stitching. This helps allow the facing to lay flat. Meld the seam together by pressing this seam.
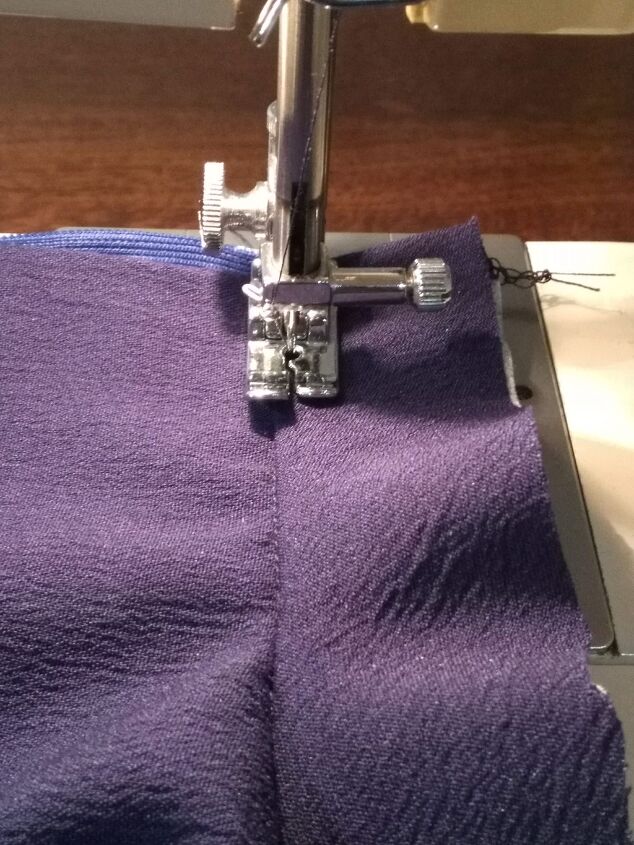
Open the neck facing and topstitch the facing and seam allowance, just a tiny bit in from the seam as shown. This understitching helps the facing stay on the inside of the garment when worn and creates a nice crisp edge.
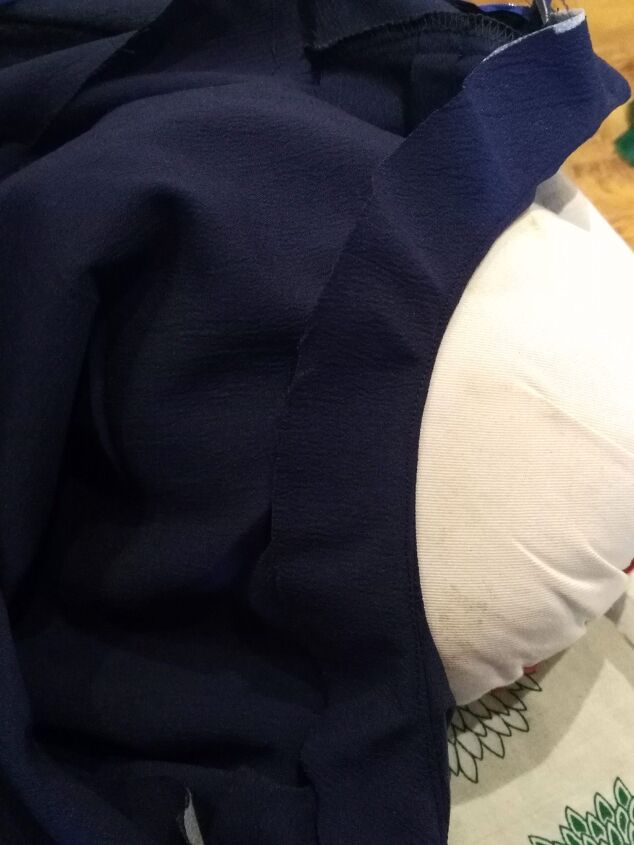
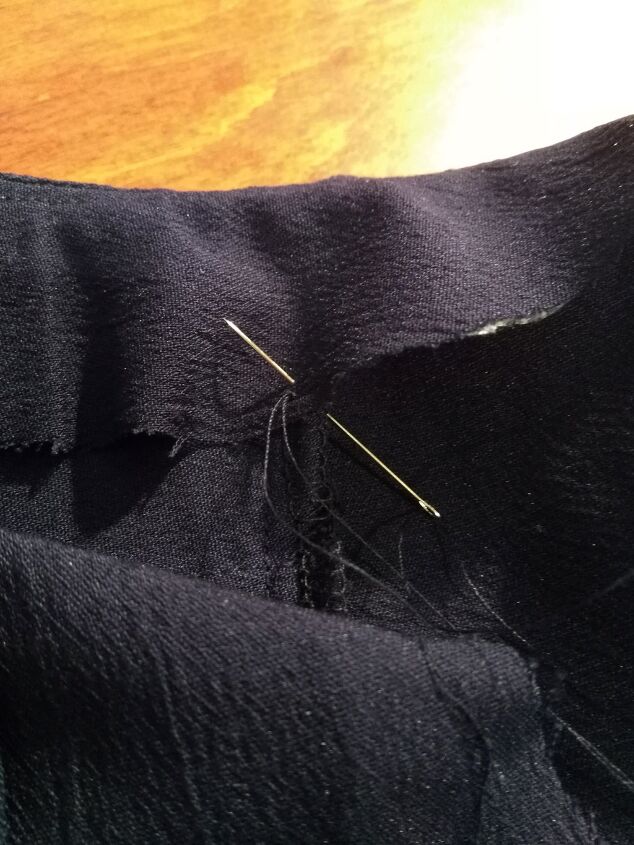
Press the facing inside the neckline. I like to use a tailor’s ham here but you could make do without one. Hand sew the facing to the shoulder seams of the bodice to tack it in place. Press it again from the outside of the garment. (To read more about pressing and ironing, read my article here.)
Finishing the facing.
You are done!
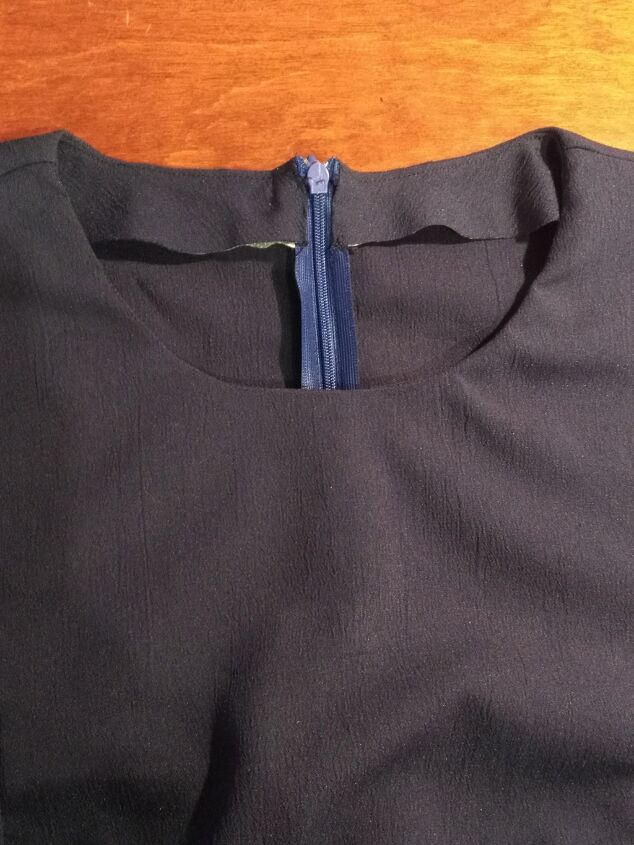

Finished neck facing on bodice.
Once you know how to make a neck facing pattern, you can change the shape of the neckline on any pattern you already have to add more variety to your sewing patterns..
Want to learn more about altering clothes you already have, to fit your unique body and style? Receive my free guide full of tips to get you started doing your own clothing adjustments by signing up to my newsletter here.
The author may collect a small share of sales from the links on this page.


Comments
Join the conversation