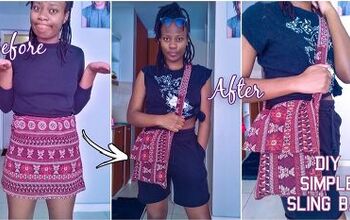
How to DIY a Cute and Fun Sling Bag Perfect for Summer

This crossbody DIY sling bag is the perfect casual bag. It’s a great project for an advanced beginner and covers lots of useful bag-making techniques.
You’re also going to learn how to make your own free pattern for a sling bag.
Tools and materials:
- 12oz canvas fabric
- Cotton lining fabric
- 1 x 1 1/2” (4 cm) slider buckle
- 2 x 1 1/2” (4 cm) rectangular ring buckles
- 1 x 12” (30 cm) double zipper
- Paper
- 8” (20 cm) diameter plate
- Pencil
- Ruler
- Fabric clips
- Scissors
- Iron
- Hand sewing needle and thread
- Sewing machine

1. Main bag pattern
Trim your paper to 10 5/8” (27 cm) by 13 3/8” (34 cm) and place it in landscape mode.

Draw 2 inch (5 cm) squares on the two lower corners.

Mark 3/4” (2 cm) from the corners on both edges.
Join the marks to the diagonally opposite corner of the squares.

Use the plate to draw a curve in both corners.

Cut out the curved edge and the center triangle in each corner.

Draw a line across the pattern 1 1/2” (4 cm) from the top edge.

Draw two vertical lines from the top edge to the horizontal line, 3/8” (1 cm) from each side edge.
Mark 4” (10 cm) down each side edge from the horizontal line.

Join the marks to the bottom of the vertical lines.

Trim the side edges to the lines.

2. Top gusset pattern
Cut a strip of paper 12 3/8” (31.5 cm) by 2 3/4” (7 cm).

Fold it in half widthways
Mark 1 1/2” (4 cm) from the top edge on the open side and 2” (5 cm) from the fold on the bottom edge.

Join the two marks, tapering the line towards the fold.
Cut out the shape.

3. Cut out the bag
Cut a piece of canvas and lining 13 3/8” (34 cm) by 10 5/8” (27 cm).

Place the bag pattern on top and trim the fabric to size for the bag back.
Fold down the top edge of the pattern along the line.
Cut canvas and lining pieces 13 3/8” (34 cm) by 9” (23 cm).
Trim them to the pattern for the bag front.

Cut a strip from the canvas and lining 12 3/8” (31.5 cm) by 2 3/4” (7 cm).
Trim them to the top gusset pattern.

4. Insert the zipper
Cut four pieces of canvas, 1 1/2” by 1 1/8” (4 cm by 3 cm).

Sandwich the ends of the zipper between the canvas pieces and sew in place.

Fold the canvas pieces outwards and top stitch.

Notch the top edges of the zipper and the canvas gusset and lining in the center.
With the right sides uppermost, place the zipper on the gusset lining and stitch the top edge.

Place the canvas lining on top with the wrong side uppermost and sew the same edge, aligning all the notches.

Snip the curve, turn the fabric to the right side and top stitch close to the edge.

Place the zipper on the right side of the bag front lining and place the canvas piece on top, wrong side uppermost.
Align the top edges and sew in place.

Fold the lining and canvas right side uppermost and top stitch close to the zipper.

5. Shape the bag
Clip the edges of each cut out triangle together on the four bag pieces, with the right sides together.
Stitch each dart 3/8” (1 cm) from the cut outs.

6. Inside pocket
Cut a piece of lining 12 5/8” by 7 7/8” (32 cm by 20 cm).

Fold it in half widthways with the right side inside.
Sew the three open edges, leaving a small opening on the longer edge.

Clip the corners, turn the pocket right side out through the opening and top stitch the folded edge.
Sew the pocket centrally to the back bag lining.

7. Buckle loops
Cut two pieces of canvas 4” by 2 3/8” (10 cm by 6 cm).
Fold them in half widthways with the right sides inside and sew the short edges together.

Open the seams flat and turn the loops right side out. Press flat with the seams in the center of one side.
Feed a loop through each buckle.

Clip a loop to each end of the zipper, 3/4” (2 cm) from the top edge of the gusset, and sew in place.

8. Assemble the bag
Place the bag back over the front with the right sides facing.
Sew around all the edges.

Turn the bag over and attach the back lining piece with the wrong side uppermost, leaving a small opening in the lower edge.
Snip the curves and the top corners.

Pull the bag out through the opening in the lining.
Hand sew the opening together with a blind or ladder stitch.
Tuck the lining inside the bag.

9. Bag strap
Cut a strip of canvas 47” by 6” (120 cm by 16 cm).
Fold it in half lengthways with the wrong side inside, and press.

Open out the strip.
Turn in the short edges and press both long edges into the center.

Press the strip in half lengthways.
Top stitch both long edges.

10. Attach the strap
Watch the video from 13:38 to 14:17 to see how I attach the slider buckle.
Feed the free end of the strap through the other loop and sew in place.


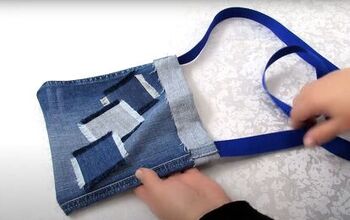
DIY sling bag
Your DIY sling bag is finished!
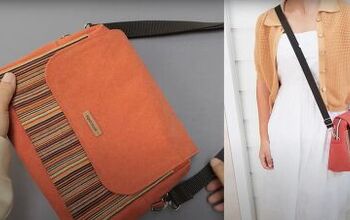
The strap is long enough to wear crossbody or as a shoulder bag.
A double opening zipper makes the bag more practical in use but if you can’t find one, use a regular zipper.
I hope you enjoyed learning how to sew a bag and I’d love to read what you thought of it in the comments below.
Next, learn How to DIY a Gorgeous Zipper Bag to Hold Your Favorite Things.
The author may collect a small share of sales from the links on this page.


Comments
Join the conversation