How to DIY a Cute and Easy Fabric Phone Case

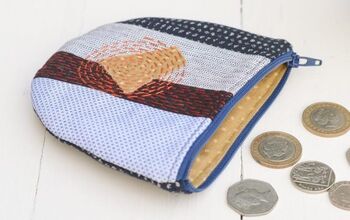
I wanted to make a DIY fabric phone case that would also double as a women’s cell phone wallet.
I used a patterned fabric for the main part of the phone pouch and a medium weight plain cotton for the cell phone purse lining and tab closure.
Note that you will only be using one side of the zipper, plus the pull tab.
Upstyle Recommends!
Tools and materials:
- Cotton patterned fabric
- Cotton plain fabric
- Fusible fleece interfacing
- 18” (46 cm) zipper
- 3/8” (1 cm) D ring
- 3/8” (1 cm) swivel hook
- Magnetic button
- Fabric marker
- Ruler
- Scissors
- Fabric clips
- Seam ripper
- Iron
- Sewing machine

1. Tab closure
Cut out your fabric and interfacing pieces as shown in the diagram.

Curve two corners of one of the smaller pieces of plain fabric.

Place a mark 4 3/8” (11 cm) from the opposite edge on the center line of the piece.

Place the center of a button back on the mark and draw in the position of the two prongs.

Cut through the fabric and push the prongs through from the right side.
Place a small piece of fusible interfacing over the prongs, place the second button back on top and press the prongs open.

Place the two pieces together with the right sides facing. Sew together 3/8” (1 cm) seam from the edge, leaving the top edges open.

Trim the second piece to match the first and snip the curves.
Turn the tab right side out and top stitch.

2. Phone pocket
Find the center of the 15” (38 cm) piece of patterned fabric.
Iron the smaller piece of interfacing to one half of it on the wrong side.

Place a mark 2 1/8” (5.5 cm) from the edge of the interfacing on the center line.

Attach the other part of the button at the mark from the right side, as before.

Fold the fabric widthways with the right sides facing and sew the short edges.

Turn the pocket right side out and top stitch the seam.

3. Wrist strap
Fold the strip of patterned fabric in half lengthways with the wrong side inside, and press.

Open out the strip and press both long edges to the center.

Press the strip in half lengthways again and top stitch both long sides.

Cut a 2” (5 cm) piece from one end of the strap.
Thread it through the D ring and clip it in place.

Undo the stitching at both ends of the strap for about 1/2” (1 cm).

Feed the swivel hook onto the strap.
Place the open ends together with the right sides facing and stitch the ends together.

Replace the top stitching.

Slide the swivel hook to 1/2” (1 cm) past the seam and sew the two sides of the strap together.

4. Main section
Iron the larger piece of interfacing to the wrong side of the remaining piece of patterned fabric.

Notch the center point of one of the shorter ends.

Clip the D ring to the notch on the right side.

Place the tab on top with the right side uppermost and sew in place.

5. Attach the pocket
Notch the center of the long edges. Place the cell phone pocket on top of the main section, with the right side uppermost.
Sew in place along the three sides, leaving the top stitched edge open.

6. Insert the zipper
Cut both ends off the zipper and slide the tab off to separate the two tapes.

Place the edge of one tape right side down on the long side of the wallet, lined up with the raw edge.
Sew in place 1/4” (0.7 cm) from the edge.

Place the wallet on the larger piece of plain fabric with the right sides together.
Sew together on the same stitching line.

Refold the wallet with the right side uppermost and top stitch close to the zipper.
Snip off the excess zipper tape at each end.

Bring the two ends together and slide the zipper tab back over the teeth.

7. Finishing
Separate the plain and patterned fabric pieces. Place them with their right sides together and tuck the tab closure inside.
Sew around the open edges, leaving a small opening at one side of the plain section.

Snip the corners.
Turn the wallet right side out through the opening and stitch the opening closed.
Tuck the plain fabric inside the zipped pocket.
Clip the wrist strap to the D ring.


How to DIY a fabric phone case
This has been one of my most popular and useful projects! The zippered pocket is large enough to take bank notes and your keys, while your cell phone is kept safe in its buttoned pouch.
You could also clip the D ring to a hook on a cord around your neck if you want to go completely hands free.
I’d love to know your thoughts on this DIY fabric phone case. Please drop me a comment below.
Next, learn How to DIY a Cute and Fun Crossbody Bag.
The author may collect a small share of sales from the links on this page.


Comments
Join the conversation