How to DIY Easy Blue Ombre Nails at Home

Here is an ombre nails color combination you may not have ever tried. But you’re definitely going to want to, once you see this.
Following along for the easiest ombre nails method you’ve ever tried, and get these stunning blue ombre nails for yourself.
Tools and materials:
- Base coat
- Steal gray gel polish
- Light blue gel polish
- Clear top coat
- Nail stamping sponge
- UV nail lamp

1. Base coat
Start with an application of clear base coat.

Cure for 60 seconds.

2. Pick your polish
For my ombre, I picked this light blue and steel gray gel polish.

3. Create your ombre nail art
Start with the gray gel polish and apply that to your whole nail.
Cure for 60 seconds.

Now switch to the blue polish and apply it just to the center of your nail from the tip to about half-way down your nail.

Use a nail sponge to lightly stamp your nails.

You can see how this blends the blue and gray.
Repeat the stamping for even better ombre blending.
When you are done stamping, cure your nails again for 60 seconds.

4. Finish with top coat
Add a clear top coat application to finish off your new blue ombre nails.

And, of course, cure one final time for 60 seconds.

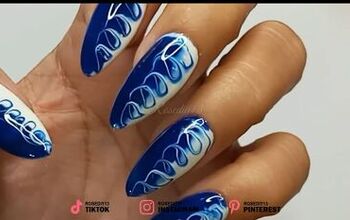
Cute DIY blue ombre nails
Look how stunning these blue ombre nails are!
Give this ombre nail art design a try and leave a comment to let me know how it worked out for you.
Next, Create This STUNNING Fairy-Butterfly Nail Design in 10 Minutes.
The author may collect a small share of sales from the links on this page.


Comments
Join the conversation