How to Sew a Gorgeous Floral Peplum Blouse

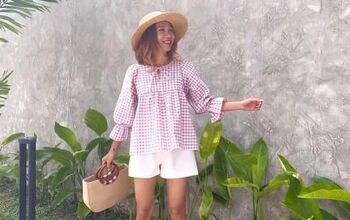
Today, I have a trendy tie front peplum top pattern with balloon sleeves in nine sizes for you, inspired by Gianni’s latest styles. I used cotton voile fabric from a thrifted skirt to make this charming floral peplum blouse. You need a similar lightweight, breathable fabric with good drape for the best effect.
The pattern is perfect for beginners and more advanced sewists, so follow along and let’s learn how to sew a blouse together!
Tools and materials:
- Free blouse sewing pattern
- Free balloon sleeve pattern
- Lightweight breathable fabric
- Lining fabric
- Paper for pattern
- Fabric marker
- Pins
- Scissors
- Iron
- Sewing machine
- Buttonhole attachment (optional)

1. Cut out the pattern pieces
Print out the pattern pieces, join them together and cut out your size.
From your fabric, cut 2 fronts, 1 back on the fold, 2 sleeves and 2 sleeve linings, 4 ties, and 2 ruffles on the fold.
Transfer all the pattern markings to the fabric.

2. Sew the darts
Pin and sew the two front bust darts with the right sides together.
Press the darts downwards.

3. Side and shoulder seams
With the right sides facing, pin and sew the back to the fronts at the sides and shoulders.
Press the seams open.

4. Neckline
Measure around the neckline.

Cut a strip of bias tape the length of the neckline and 1 1/4” (3 cm) wide. If necessary, join two pieces to make the length you need.

Turn in the short ends of the tape.
Pin the tape to the edge of the neckline inside the front seam allowances, with the right sides together and the raw edges aligned.

Fold and pin the front seam allowances back over the ends of the bias tape.

Sew the tape in place.

Turn the neck edging to the inside, fold under the edge and pin it below the first stitching line.
Sew in place.

5. Peplum
You can use my pattern to cut this, or measure the length of the blouse hem and multiply by 1.5 or 2 times.
The depth of the ruffle depends on the finished length you want for the blouse. My peplum is 4 inches (10 cm) deep.

Sew two rows of gathering stitches along one long edge of the peplum, leaving long ends.
Sew a narrow double hem on the side and bottom edges of the peplum.

Gather the ruffle to fit the bottom edge of the blouse.
Pin and sew the ruffle to the blouse with the right sides facing, between the inside edges of the front plackets.

6. Front plackets
Fold the peplum to the right side at the front edges.
Turn under the seam allowance of the placket, then fold the placket back over the end of the peplum. Pin and sew in place and repeat on the other side.

Turn the placket corners right side out.
Fold the plackets to the inside and pin and sew in place.

7. Sleeves
Sew two rows of gathering stitches along the lower edge of the sleeve.

Gather the sleeve to fit the lower edge of the lining.

With the right sides together, pin and sew the sleeve to the lining.

Open out the fabric and fold lengthwise with the right side inside.
Sew the sleeve seam.
Repeat for the second sleeve.
Turn the sleeves right side out.

Insert them into the blouse armholes, with the right sides together.
Pin and sew in place, creating pin tucks or pleats at the top of the sleeves to ease them into the armholes..

8. Buttonholes and ties
Fold the ties in half lengthways with the right sides inside and sew the long and short edges.
Turn them right side out and press flat.

Make four equally spaced buttonholes on the bodice section of the right front placket.

Pin and sew the center of the four ties to the left placket, level with the buttonholes.

Feed one end of the ties through the buttonholes and tie in a bow.
If you prefer, you can replace the ties with buttons or attach the ties between the buttons and buttonholes, and it will still look super cute.

Floral peplum blouse
This is a very versatile pattern that you can customize in several ways. For example, you can replace the balloon sleeves with straight or puff sleeves of various lengths.
You can make a ruffled dress from the same pattern by making the peplum deeper or adding several of them for a tiered dress. If you do this, remember to make each tier longer than the one above so the skirt flares outwards.
I hope you enjoyed following along with this project and I’d love to know in the comments below how you got on with it.
Next, learn How to Sew a Cool Stevie Nicks-inspired Cropped Denim Top.
The author may collect a small share of sales from the links on this page.


Comments
Join the conversation