Different Ways to Add Rhinestones to Your Clothes for Extra Sparkle

I was inspired by some gorgeous, iron-on rhinestone material that would be awesome for a clothing DIY without having to tediously apply individual rhinestones!
Follow along to learn how to use rhinestones on clothes.
Upstyle Recommends!
Tools and materials:
- Iron-on rhinestone panels
- Heat press or iron
- Assorted garments
- Fabric scissors
- Fabric glue
- Thin, scrap fabric
- Iron
- Chalk
- Ruler

Here is some inspiration to keep in mind while we test out this rhinestones on clothes experiment.

Rhinestone sweater
1. Brainstorm
Instead of copying the wide stripes from the inspiration photo, the plan is to cover the black stripes of my existing sweater with the rhinestones.

Cut your rhinestone strip, making sure it’s slightly longer than the black stripe, just in case.
I’m going to cut it 3 rhinestones wide to maintain a black border.

2. Align your first rhinestone strip
Set the heat press to 385 degrees. You can always go up or down or change the pressure of the clamp. If you don't have a heat press, you could use an iron instead.
I applied a bit of fabric glue, just to keep the strip in place before it’s fused in the press.

3. Test your heat press with the first stripe
Place your sweater inside the heat press and clamp it down, making sure each section of the strip gets pressed.
Don’t use parchment paper, like I did at first, since it stuck to the rhinestones!

4. Cut more strips
Line up the rhinestone material with the other stripes to determine the right widths and cut them.

5. Line up your pieces
Lay the sweater flat and line up the rest of your rhinestone strips, centering them within the black stripes.

Use fabric glue to minimally tack them in place.

6. Attach rhinestones with the heat press
Put the bottom opening of the sweater around the bottom of the press.
Use a thin piece of scrap fabric instead of parchment paper to go between the press and the rhinestones.

Press the clamp down for about 30-45 seconds.

Continue rotating the sweater around to be able to clamp down the side seam.
At first I wasn’t sure what to do because the black stripes did not match up and they got thinner on the other side.
The result was that I no longer had a black border on this side of the sweater.
If your garment doesn’t have this issue, feel free to continue the garment.

Pink crew neck sweatshirt
Let’s attach iridescent rhinestones to this perfect, pink crew neck!

1. Plan your layout
I’ve learned so far that the most time-consuming part of this rhinestone design is laying out your design.

2. Prep for heat press
For transferring your garment to the heat press:
Option 1: sketch your design with chalk, lay it inside the press and then lay on the rhinestone strips.
Option 2: create your whole design while the garment lays flat. Then lightly iron it, just enough so that the rhinestones are held in place in the center portion.

3. Press the horizontal lines
Transfer it to your heat press, insert a thin cloth and fuse the rhinestone strips for 35-40 seconds.

Once that center portion is fused, slide it to the right or left to continue fusing until the entire length of the strips are fused to the sweatshirt.

4. Create the caged effect
Cut thin rhinestone strips to fit in between the horizontal lines to create a vertical line at the center of the sweatshirt.

Press them and then lay out diagonal lines for a tapered effect.
You’ll need to count the rhinestones in between to make sure you align the diagonals evenly.

5. Press
Do one final press for the whole thing.

What do you think of the result?

Now that you understand the basic rhinestone pressing formula, I’ll share some more quick ideas:
Bold striped black t-shirt
I cut strips that are 3 rhinestones wide, laid them out on the t-shirt and measured to ensure they were evenly spaced.
Then I lightly ironed them so they wouldn’t shift before transferring to the heat press.

I tried on the top and decided to extend the rhinestone stripes to the sleeves.

Here’s how it turned out:

I love the oversized fit of this menswear t-shirt:

Rhinestone jeans
The rhinestone material works great on jeans too!

The material made it easy to cut out custom shapes to go around the holes in these jeans and the rugged, bottom hem.

See how they look:


Ideas for the leftover scraps
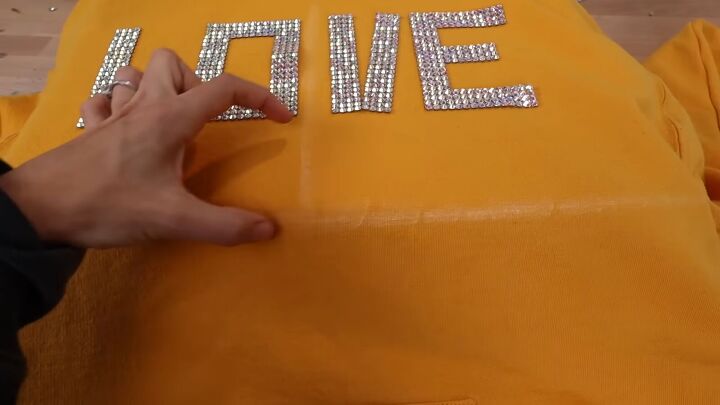
With leftover scraps, you can cut out block letters to make other custom items.
Use chalk to draw lines that can help you center the letters on the garment:
I cut off some extra material to make this cropped sweatshirt:

You can also use your heat press to attach rhinestone appliques, like this fun rainbow:

I decided to wrap it around the side of a children’s sweatshirt.

It came out so cute!

Rhinestones on clothes
Using the rhinestone sheets and a heat press makes adding rhinestones to garments so easy, and the possibilities are endless! What idea is your favorite? Comment down below.
Next, learn how to DIY an elastic corset belt.
The author may collect a small share of sales from the links on this page.


Comments
Join the conversation