Upcycle Your Fabric Scraps Into a Fun and Quirky Shirt

Today, I’m using leftovers from two previous projects and refashioning them into a third garment.
Upcycling a shirt is a very satisfying project in my opinion, because there are so many different parts of it that you can use.
In this case, the thick plaid shirt and the knitted sweater were similar weight fabrics so I had lots of options to use them together.
Check out what I ended up doing!
Best fabric scissors!
Tools and materials:
- Plaid shirt
- Knit top
- Scissors
- Pins
- Sewing machine
1. Plan your refashion
I had a shirt without a back and a knitted top without sleeves, so I had to decide the best way to upcycle them into something new.
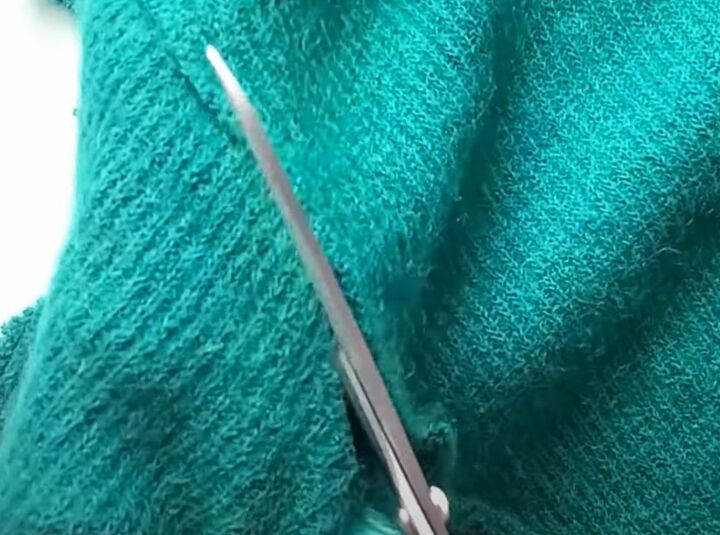
I turned the sweater into a usable piece of fabric first by removing the excess material on the back. I cut along the side and shoulder seams and the base of the collar.
I left the thick seams intact to stop the fabric from unraveling.
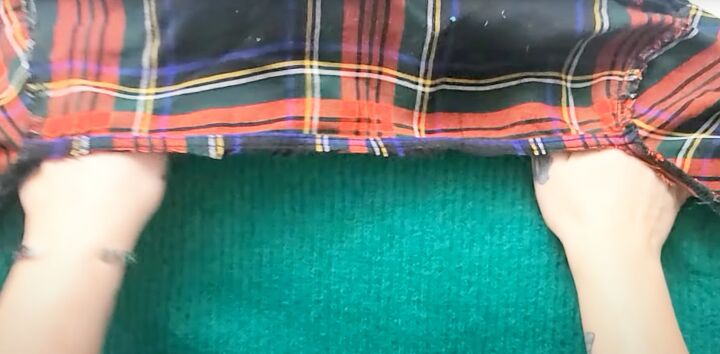
I turned the shirt inside out and laid it out flat.
I started by lining up the shoulder seams of both garments.
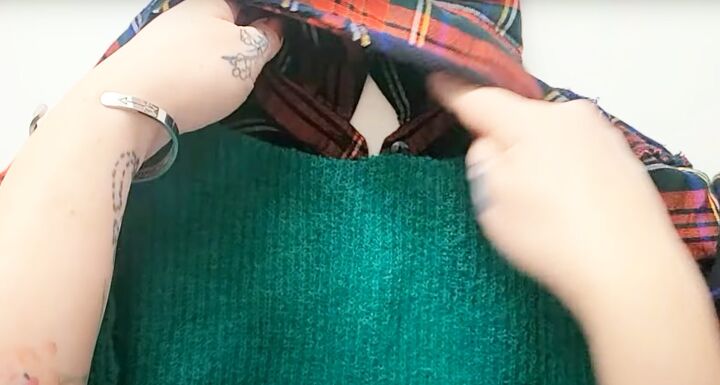
The back yoke of the shirt was intact so I placed the knit fabric inside it and matched the neckline with the base of the shirt collar.
This showed me exactly what I had to work with and how much of each garment I needed to keep.
2. Cut to size
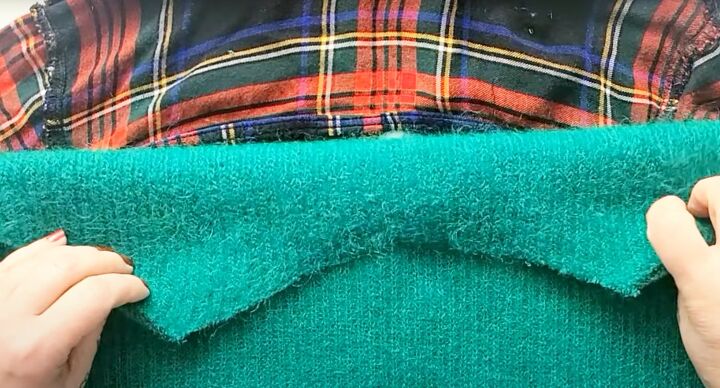
I folded the knit fabric down level with the bottom of the yoke and cut off the excess above it.

I also had to create a new back armhole shape on the sweater, to match the top of the shirt sleeve.
I folded the top corner down to line up with the sleeve top and cut off the surplus fabric on both sides.

3. Join the fabrics
I pinned the knit fabric to the back of the shirt with the right sides together along the back yoke, armholes and side seams.

The sweater was narrower than the shirt at the lower edge, so I was hoping that this would pull the shirt in and give it some shape.

I sewed the two fabrics together and then trimmed off the excess fabric, which included the thick seams left on the sweater.

4. Finishing touches
I turned the new garment right side out.
The front of the shirt was obviously longer than the knit fabric that made up the back.
I cut the front to the same length plus an allowance for the hem.

I finished the front with a narrow double hem.

To create a visual link between the knit back and the rest of the shirt, I used the collar I’d cut off the sweater to make two cuffs.
I cut the collar in half and joined the pieces into two circles.
I removed the original shirt style cuffs and set them aside for another project.
I folded the new cuffs in half and attached them to the ends of the sleeves, with the right sides facing.


DIY upcycled shirt idea
I wouldn’t call this my most successful refashion, but it’s comfortable and it fits. In fact, for taking two leftover garment pieces and upcycling them together, I think it came out really well.
I’m particularly pleased I thought to re-use the collar to make the cuffs.
As you can see, I don’t measure very much when I’m upcycling clothes, I go by eye and just cut and see what happens.
So don’t be afraid to try things out. You never know how creative you can be until you try!
Please drop me a comment and let me know what you think and if you would have done it differently.
Next, check out my Easy Tutorial on How to Make a Dress Bigger.
The author may collect a small share of sales from the links on this page.


Comments
Join the conversation